Prepping an FB RX7 differential for my Roadster
Motivation
My roadster is a United States market NA6 Mazda Miata, meaning that it originally came with a 1.6L engine and a small diameter differential with a 4.3:1 reduction ratio. In the United States these are called 6” differentials. I think it has a viscous coupling limited slip differential, but I’m not sure. It has over a quarter of a million miles on it.
These 6” differentials are said to be weak when trying to work sticky tires, even at stock power levels. While there are some aftermarket clutch-type limited slip differentials available for this application, there’s only the 4.3:1 reduction gears available.
Parts selection
Mazda eventually changed to a larger differential in the Miata, giving the NA8 a 7” diameter differential. This differential was previously used on the RX-7. There are many aftermarket clutch-type limited slip differentials available for this family, including relatively inexpensive ones from Tomei or well-tuned and proven ones from OS Giken. Mazda even fitted a clutch-type 2-way limited slip differential to the FB and FC RX-7s A cornucopia of ratios are available for it. There’s also competition literature from Mazda about these.
While a Tomei differential would not have been expensive, I was curious to see what I could do with the OEM Mazda clutch-type LSD. Parts are still available from Mazda and others and it has been used in competition for a decade. I picked up an FB LSD and an NA8 Miata open differential with 4.1:1 ratio reduction gears to put the clutch-type differential into. To install the later 7” differential into an NA6 requires changing axles and driveshaft, so I grabbed those as well.
Clutch-type LSD rebuild
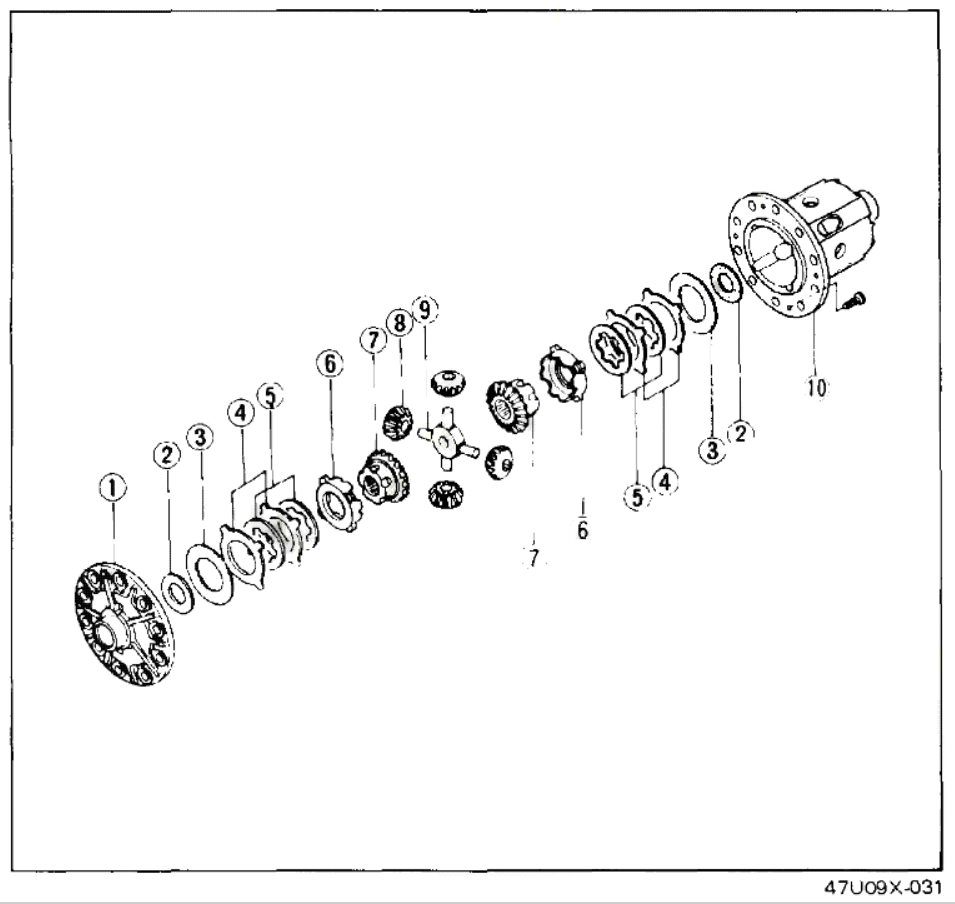
Mazda changed the arrangement of plates in the clutch LSD sometime between the FB and FC RX-7s. In the FB service manual Mazda instructs the plates to be arranged as one would expect, alternating between plates with lugs on the inside, engaging in the side gears and outside, which engage in the differential case. For a given plate count this maximizes the friction surface area:
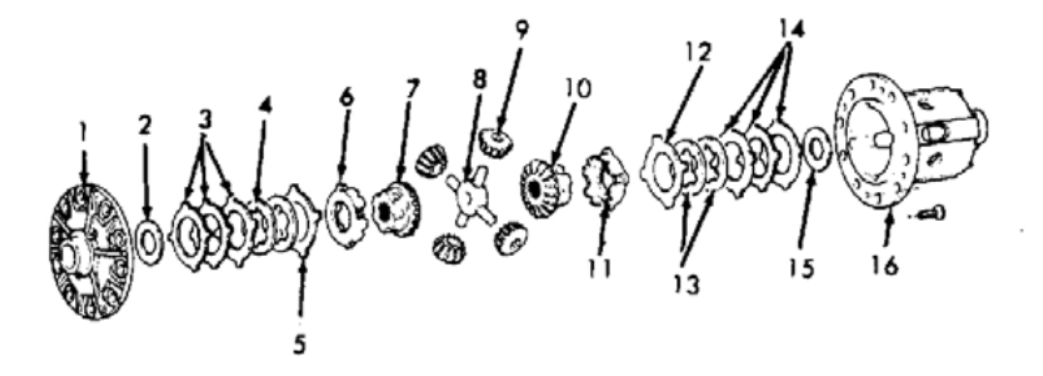
The later FC manual changes the arrangement to make for less surface area between opposing plates. This probably makes for a more progressive actuation. Note that this figure is for the turbo RX7 differentials which have a total of 12 plates instead of 8, but the arrangement of inside and outside plates is similar for nonturbo RX-7s.
I’m interested in making my diff relatively grabby, so it’s my intention to follow the FB arrangement of plates. When I opened my differential I found an even more unusual arrangement of plates:
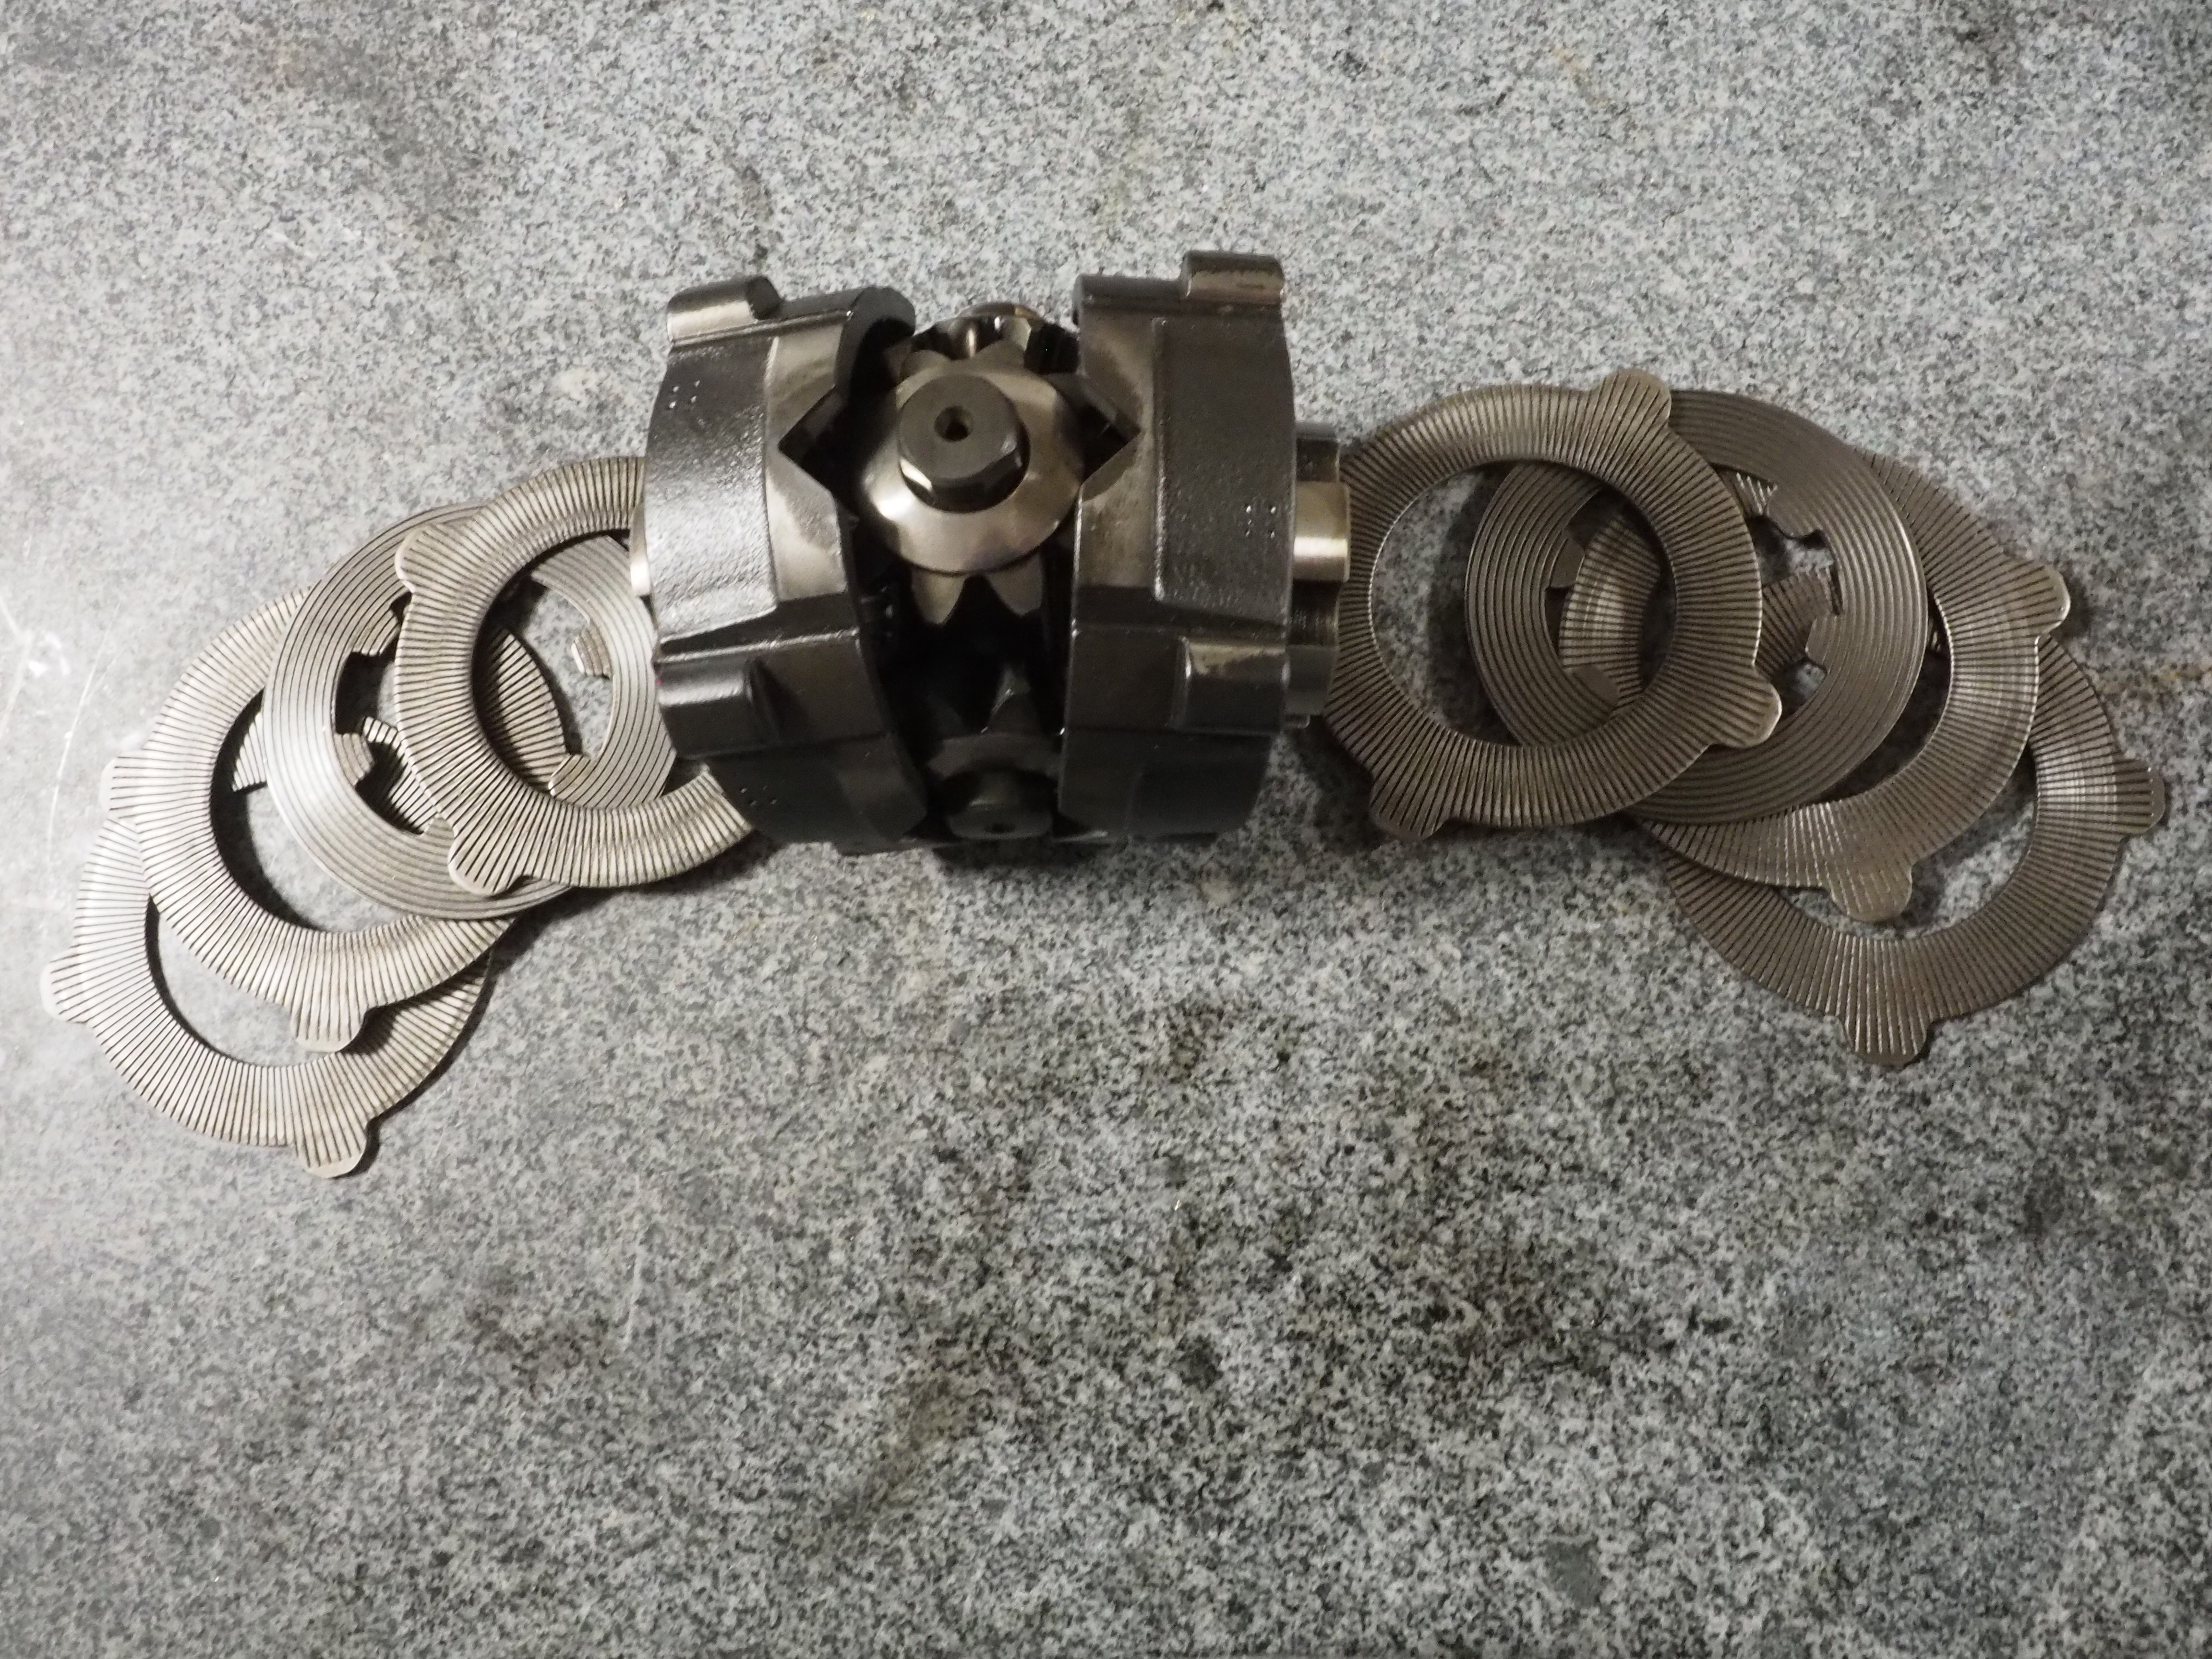
I don’t expect this would behave much differently from the FC arrangement, but it does prevent me from just rearranging plates. As stated earlier, parts are still available for these, and service parts include thicker inside plates, which are Mazda part number M020-27-257. I ordered two and continued cleaning parts.
Side gears and stub shafts.
I ordered my Miata differential with stub axles so that the differential doesn’t leak everywhere when outside of the car. On the Miata, with its independent rear suspension, the axles are held in by c-clips captured by the side gears of the differential. My LSD came out of an FB RX7. These cars have a solid rear axle so the axle shafts were held in by bearings and retainer plates at the far ends of the axle housing. The side gears of my LSD were not provisioned to retain the axle stubs with c-clips.
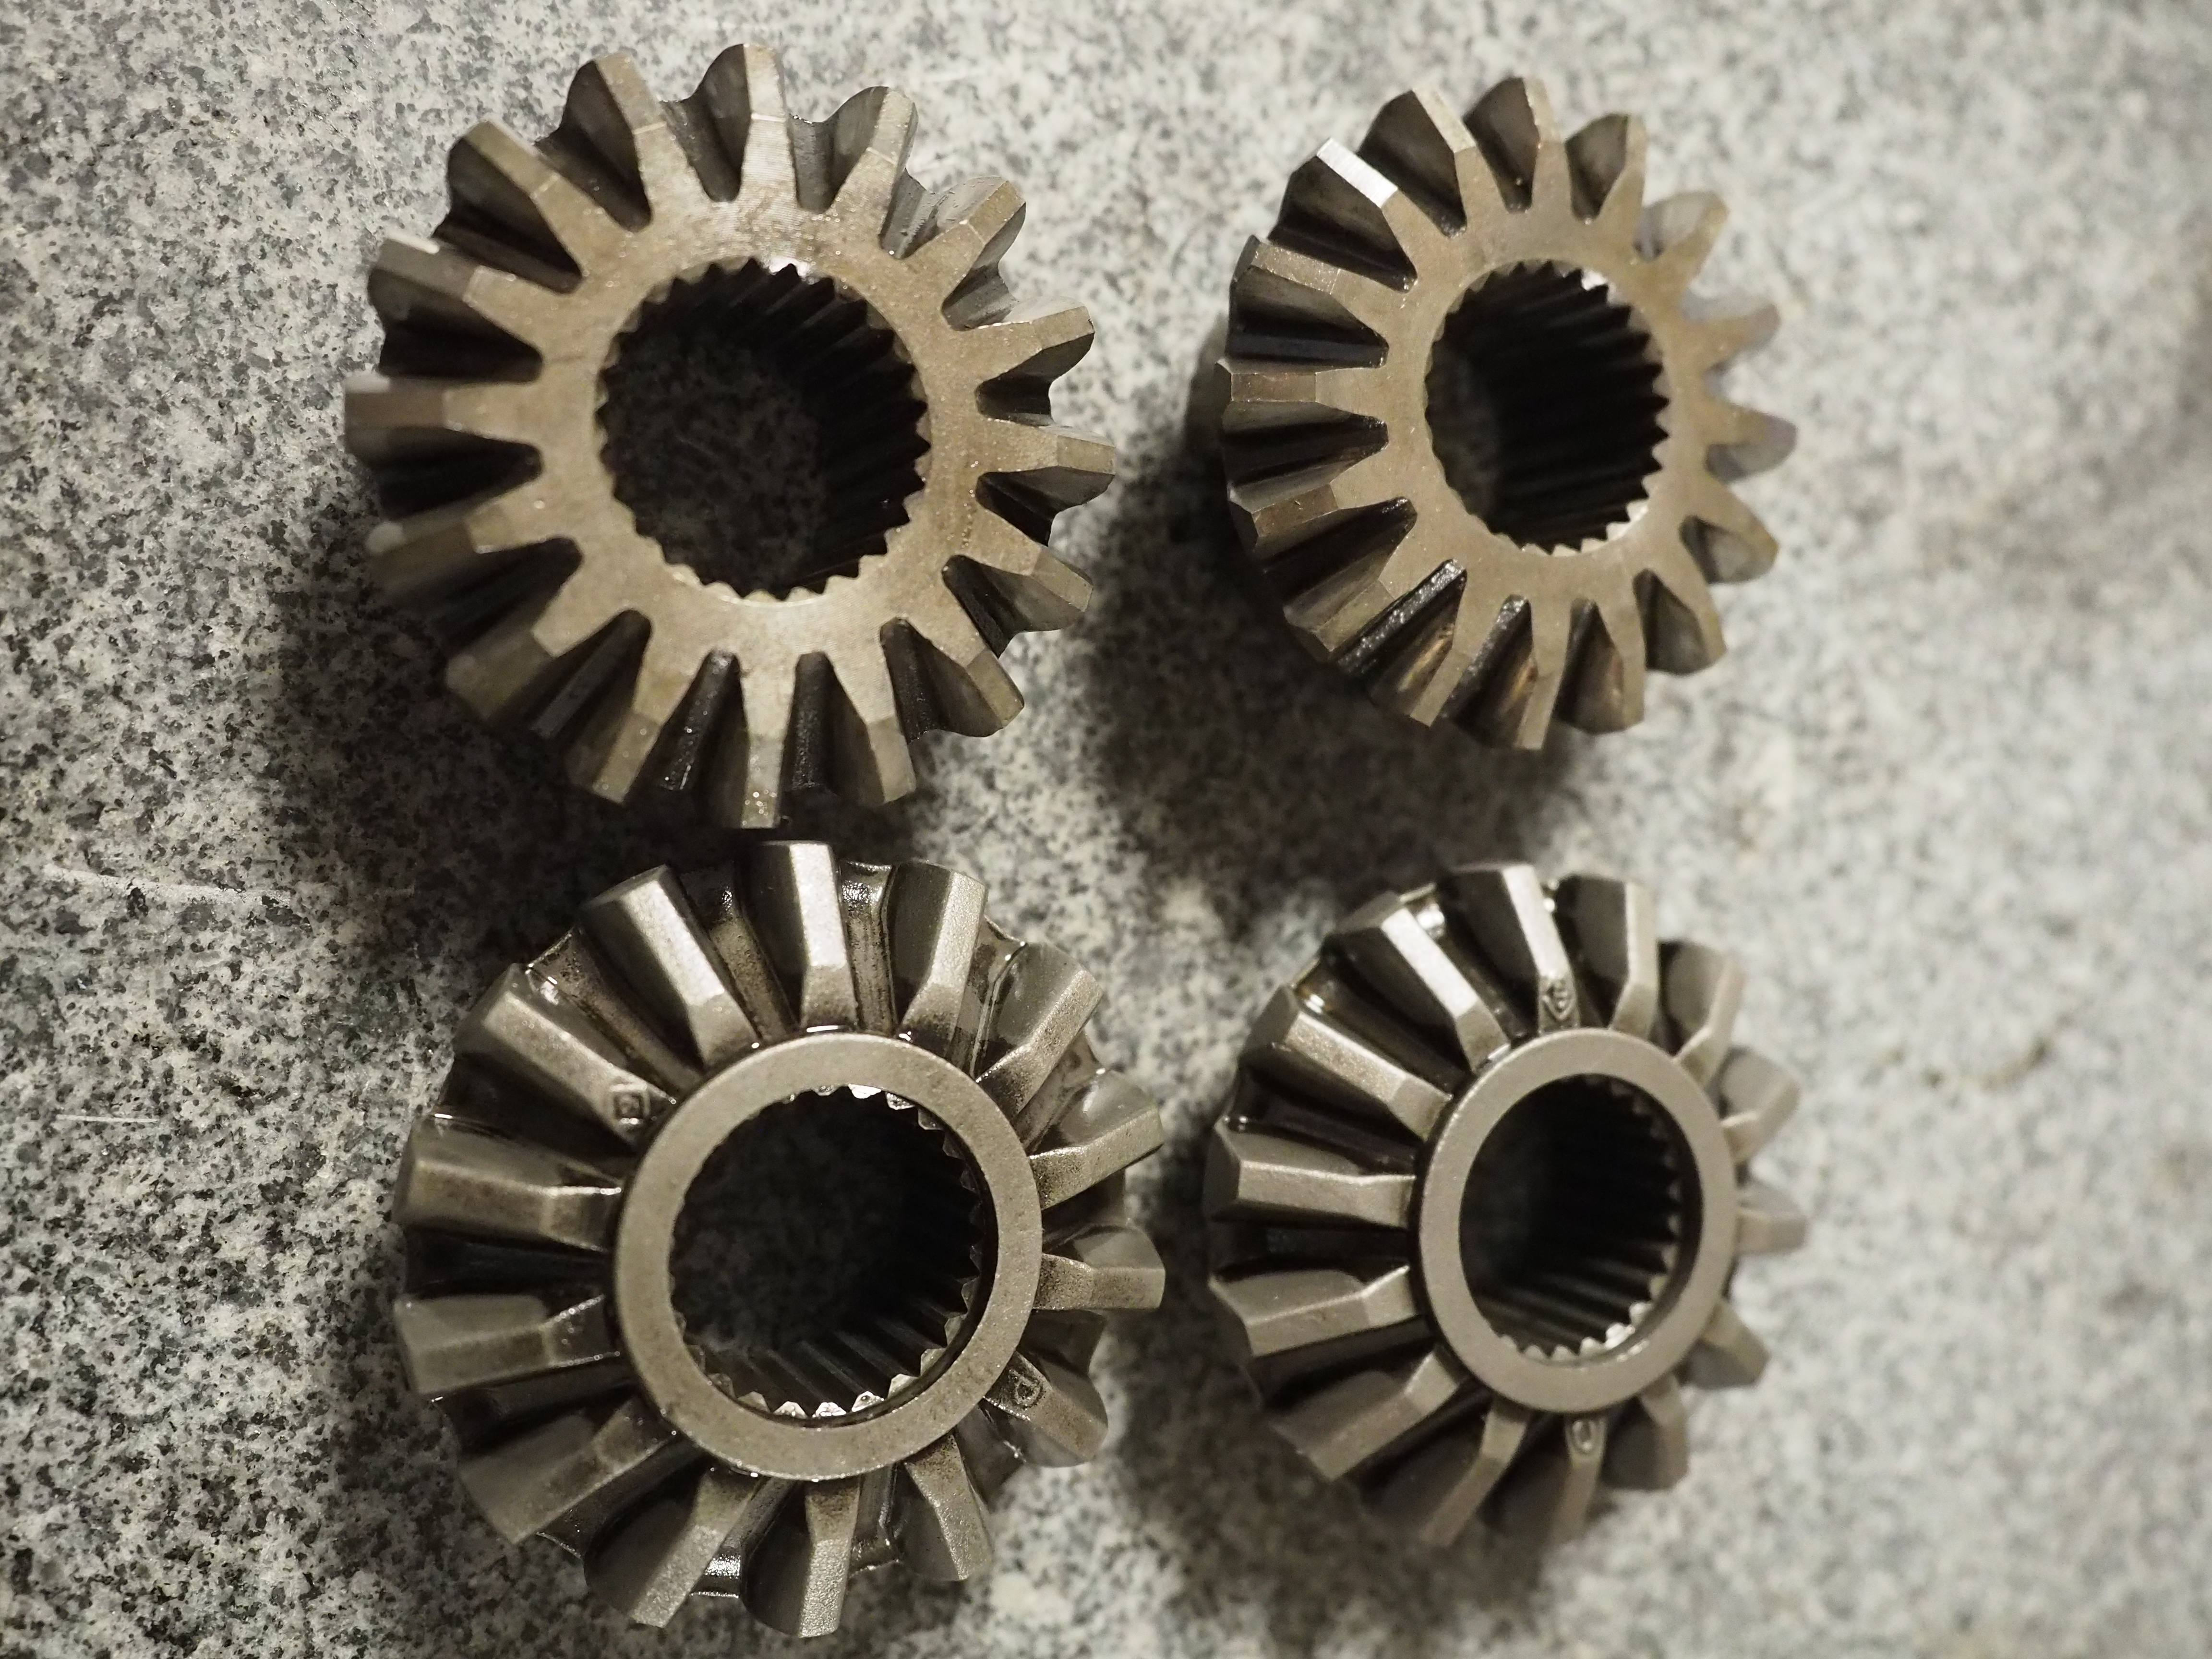
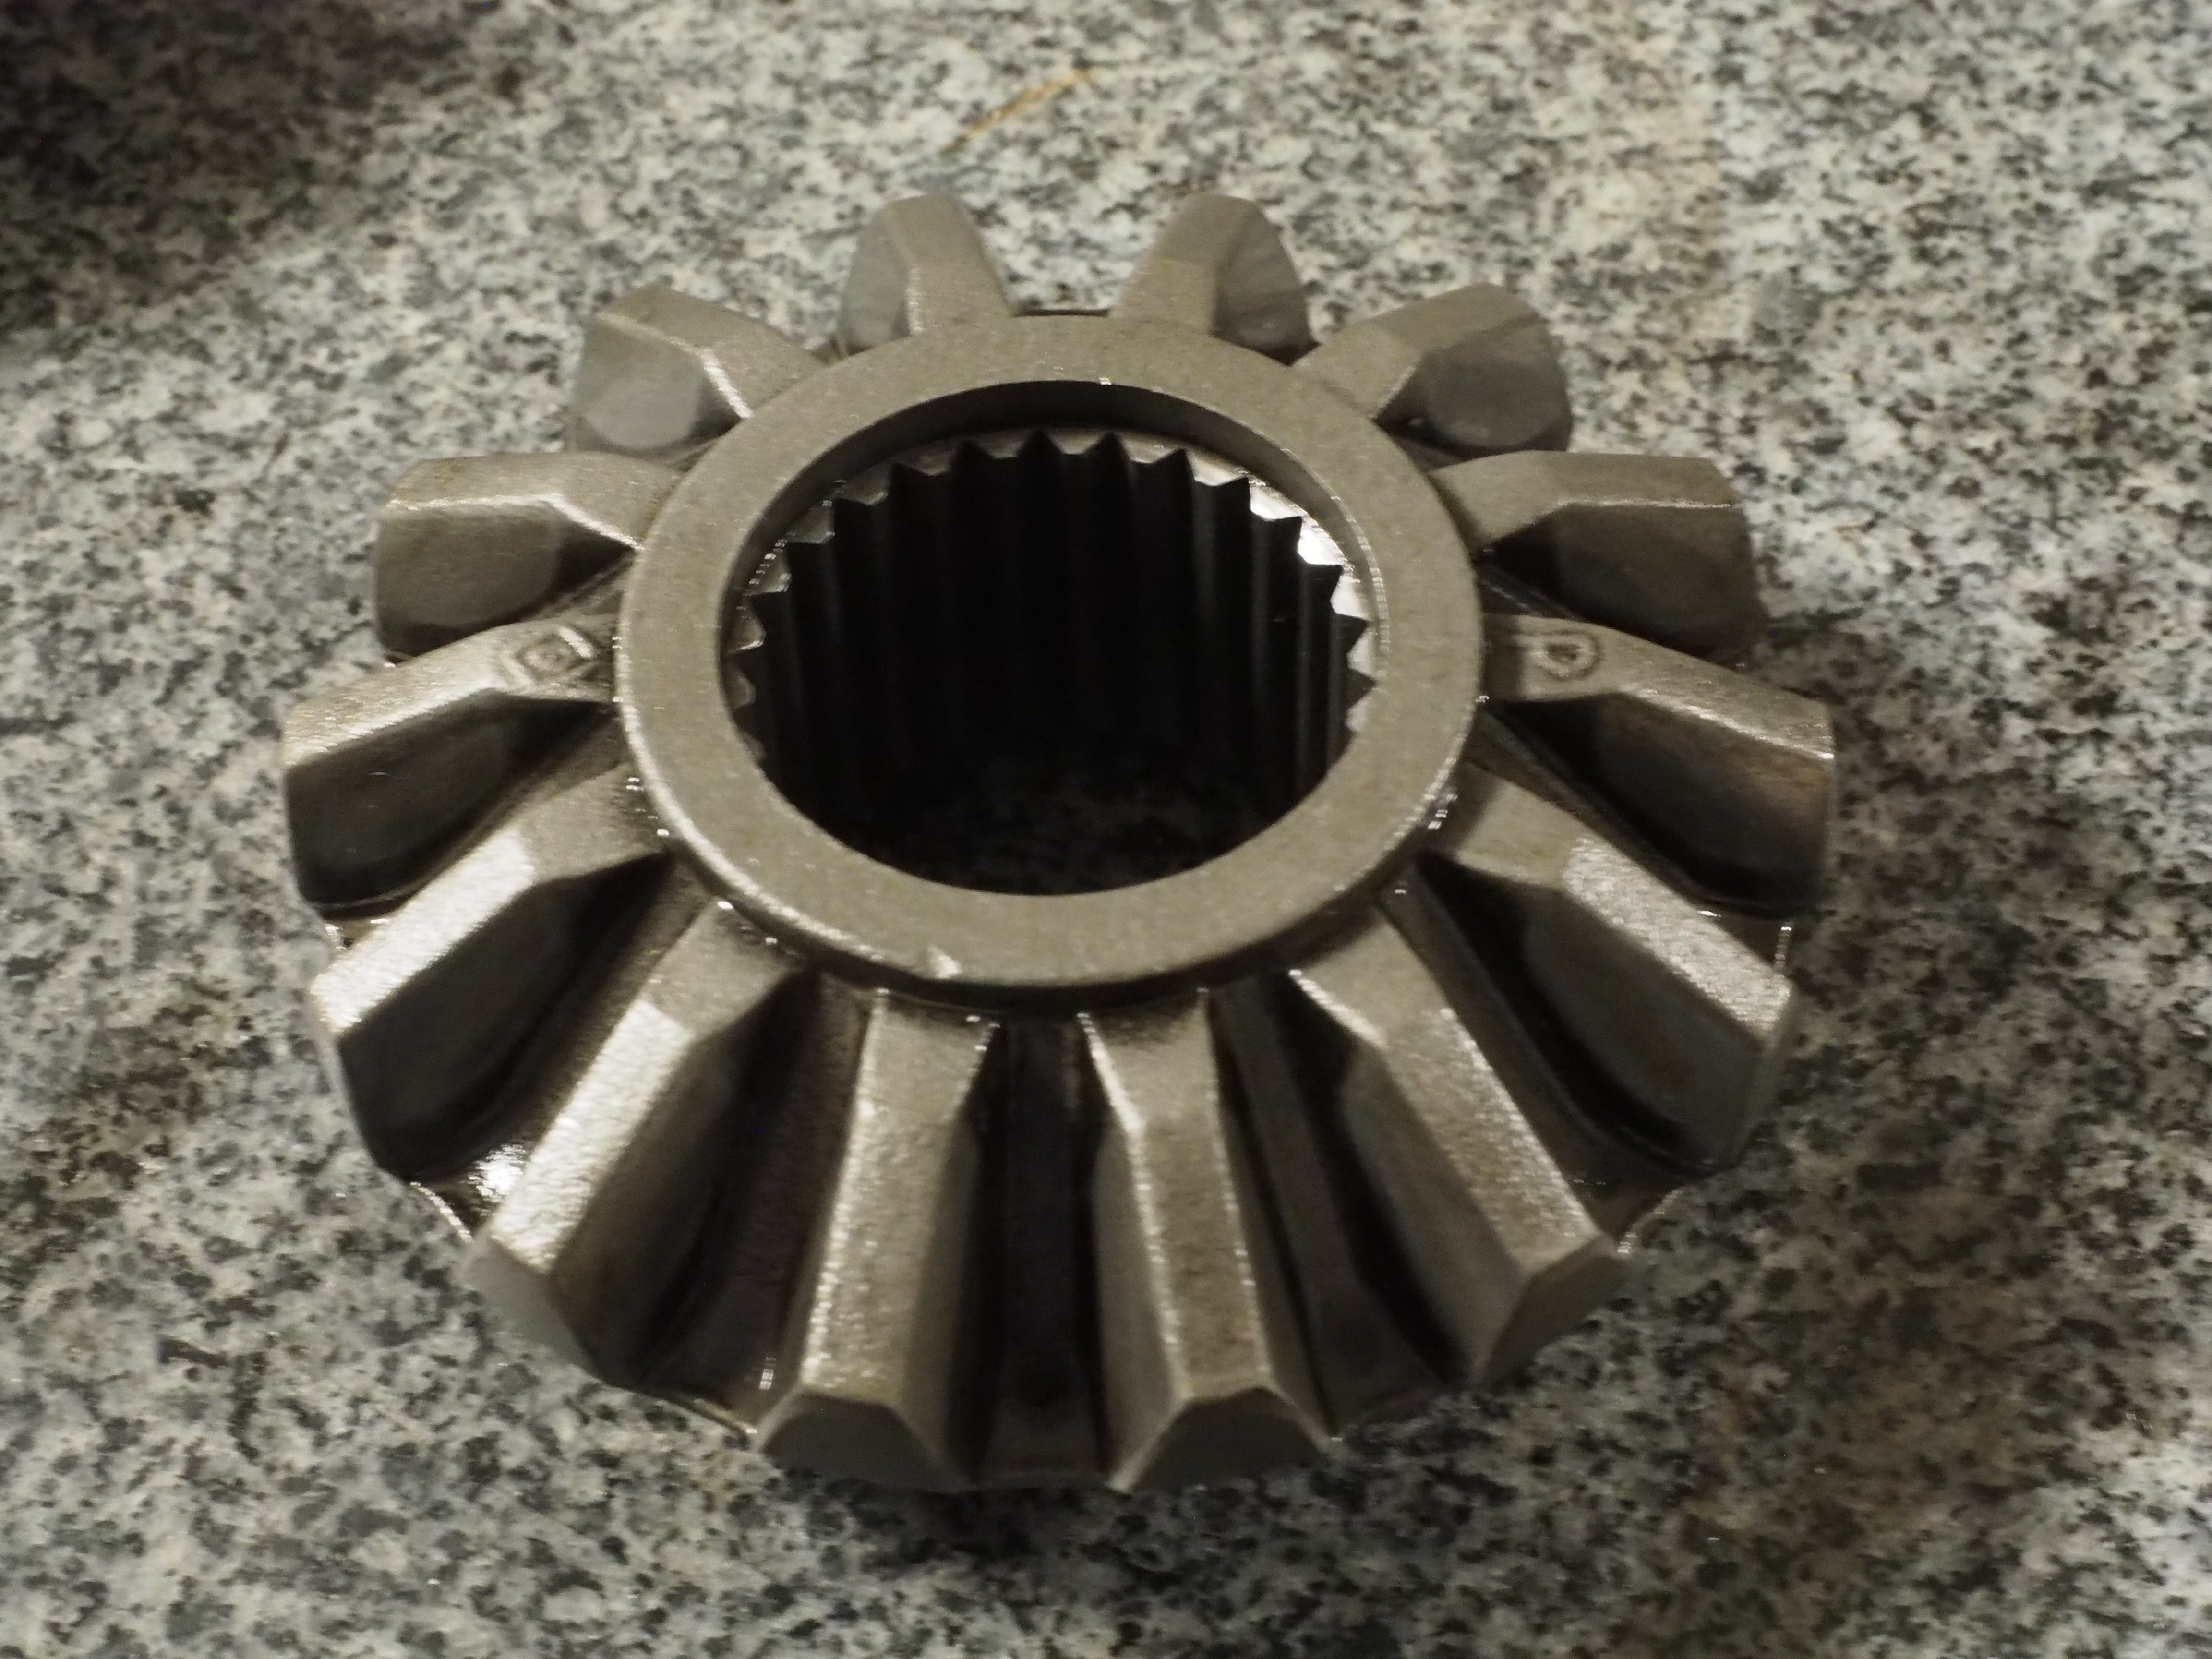
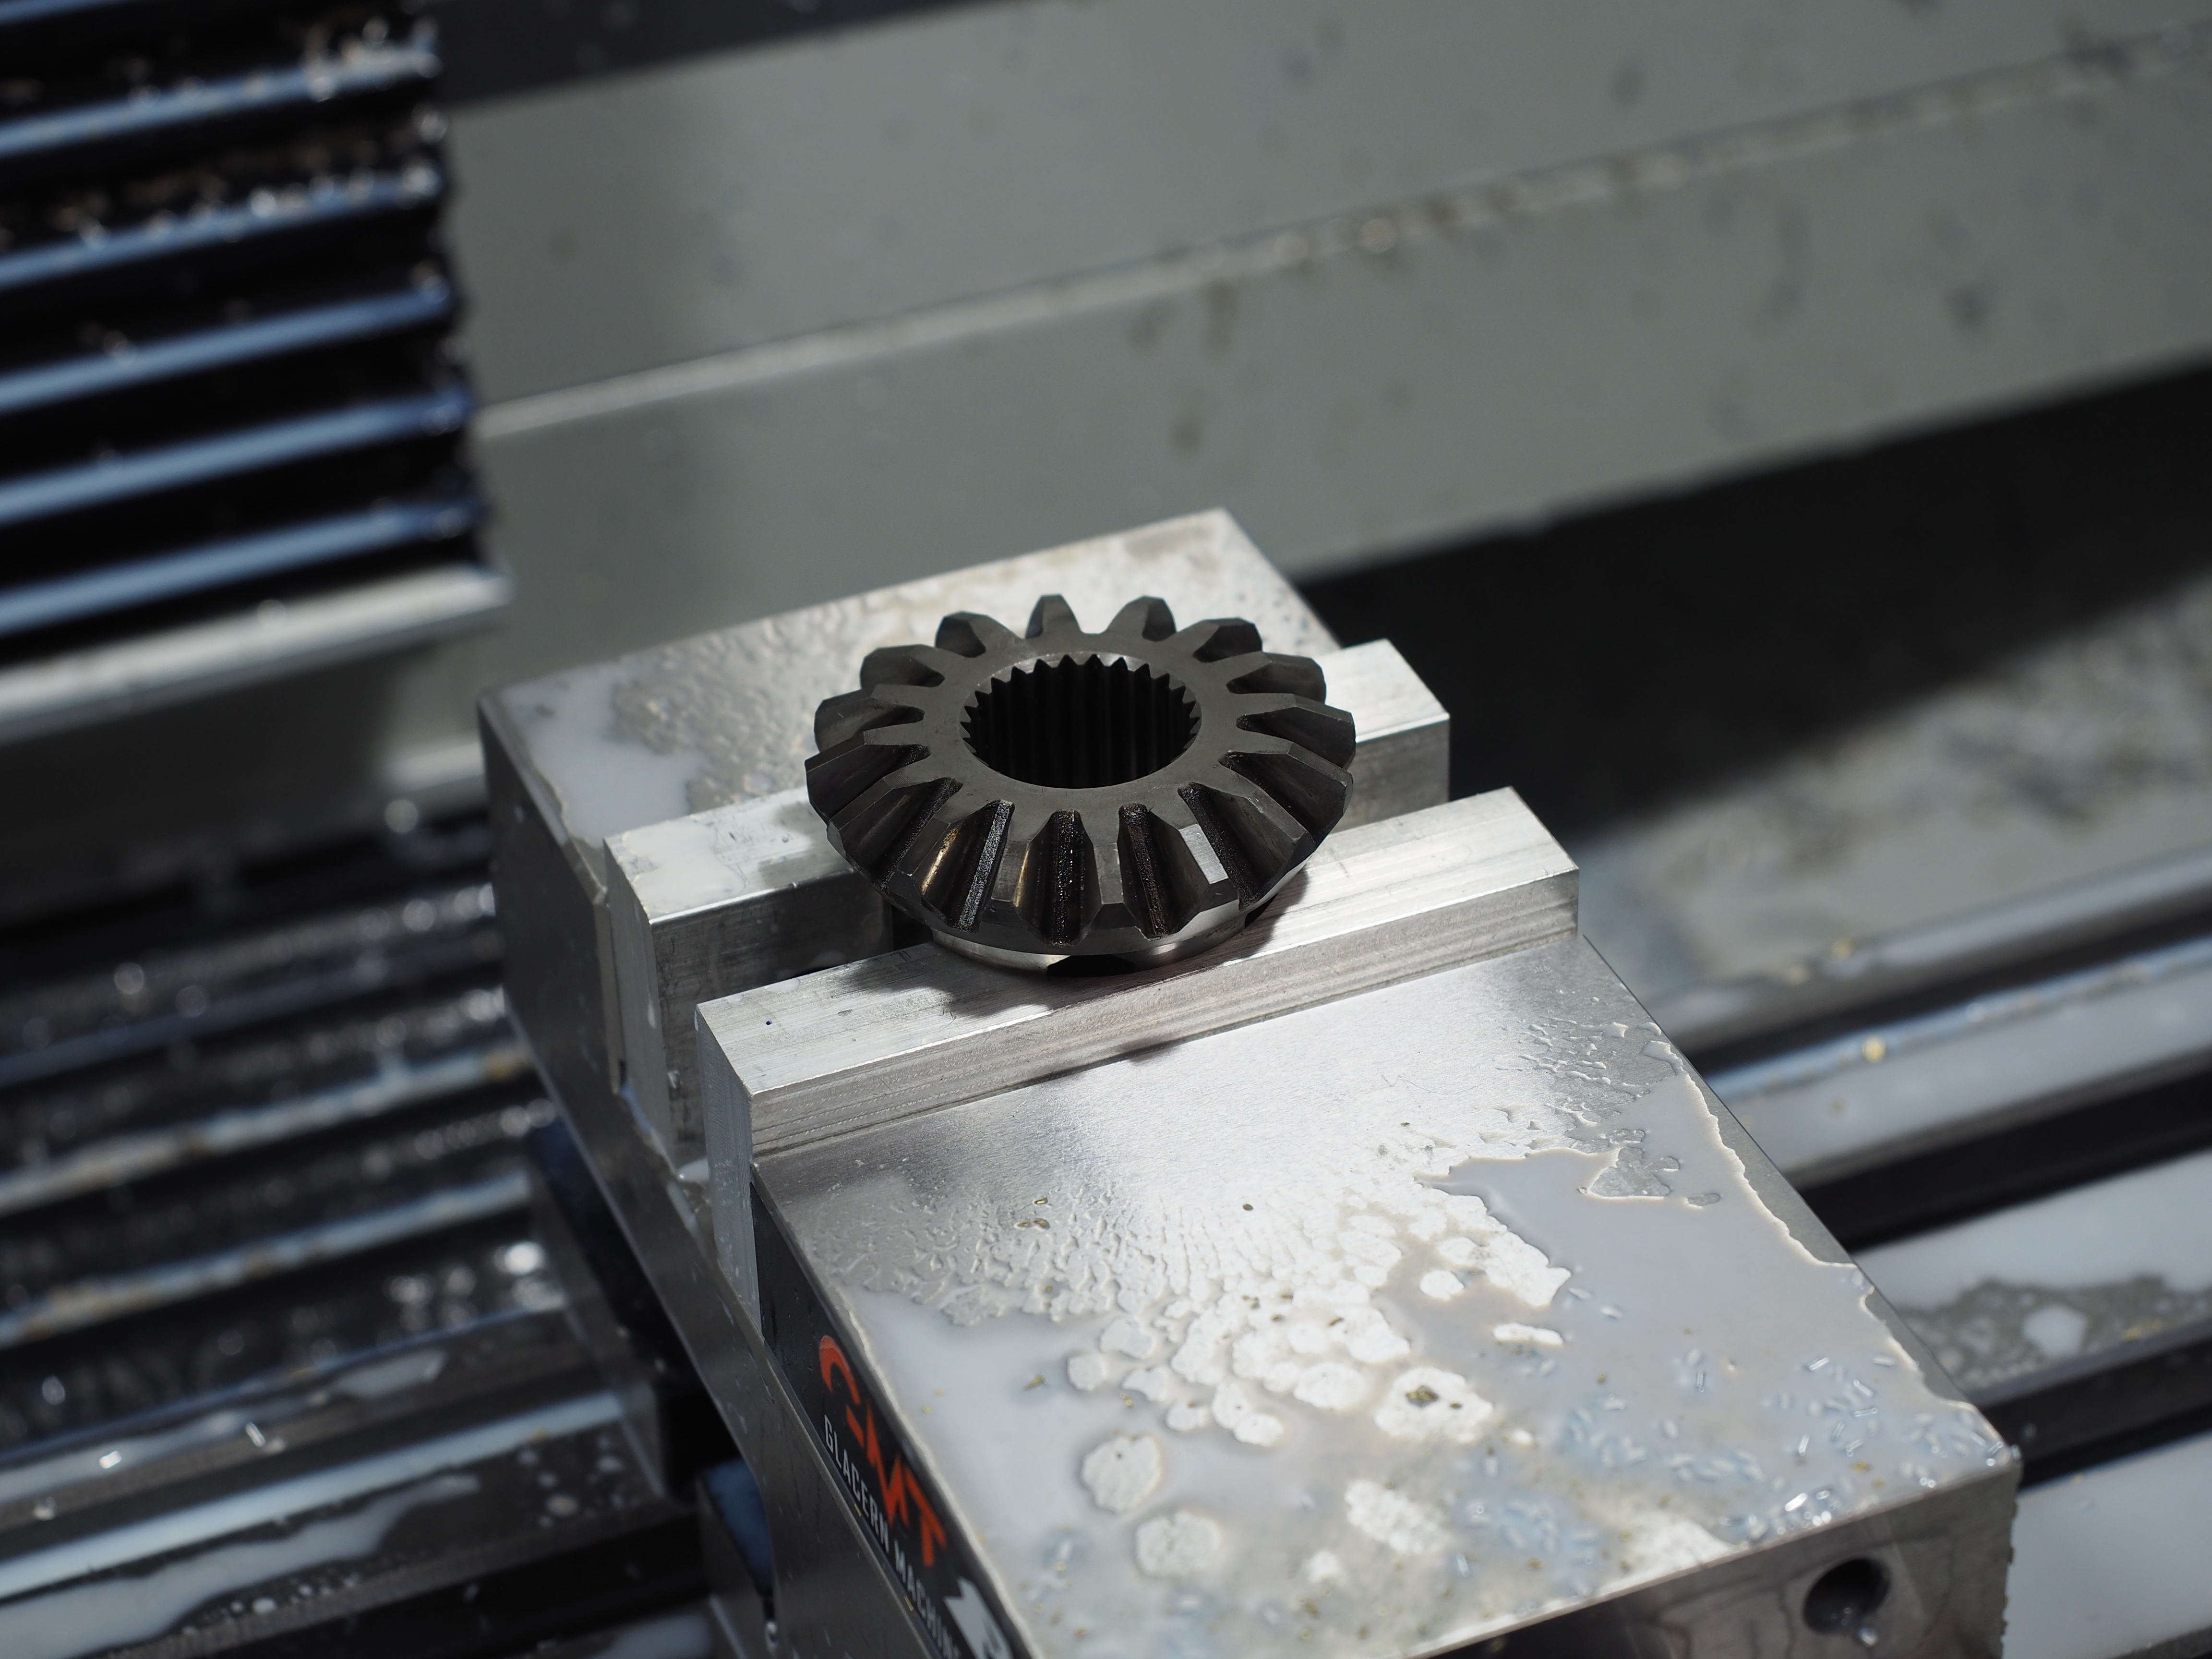
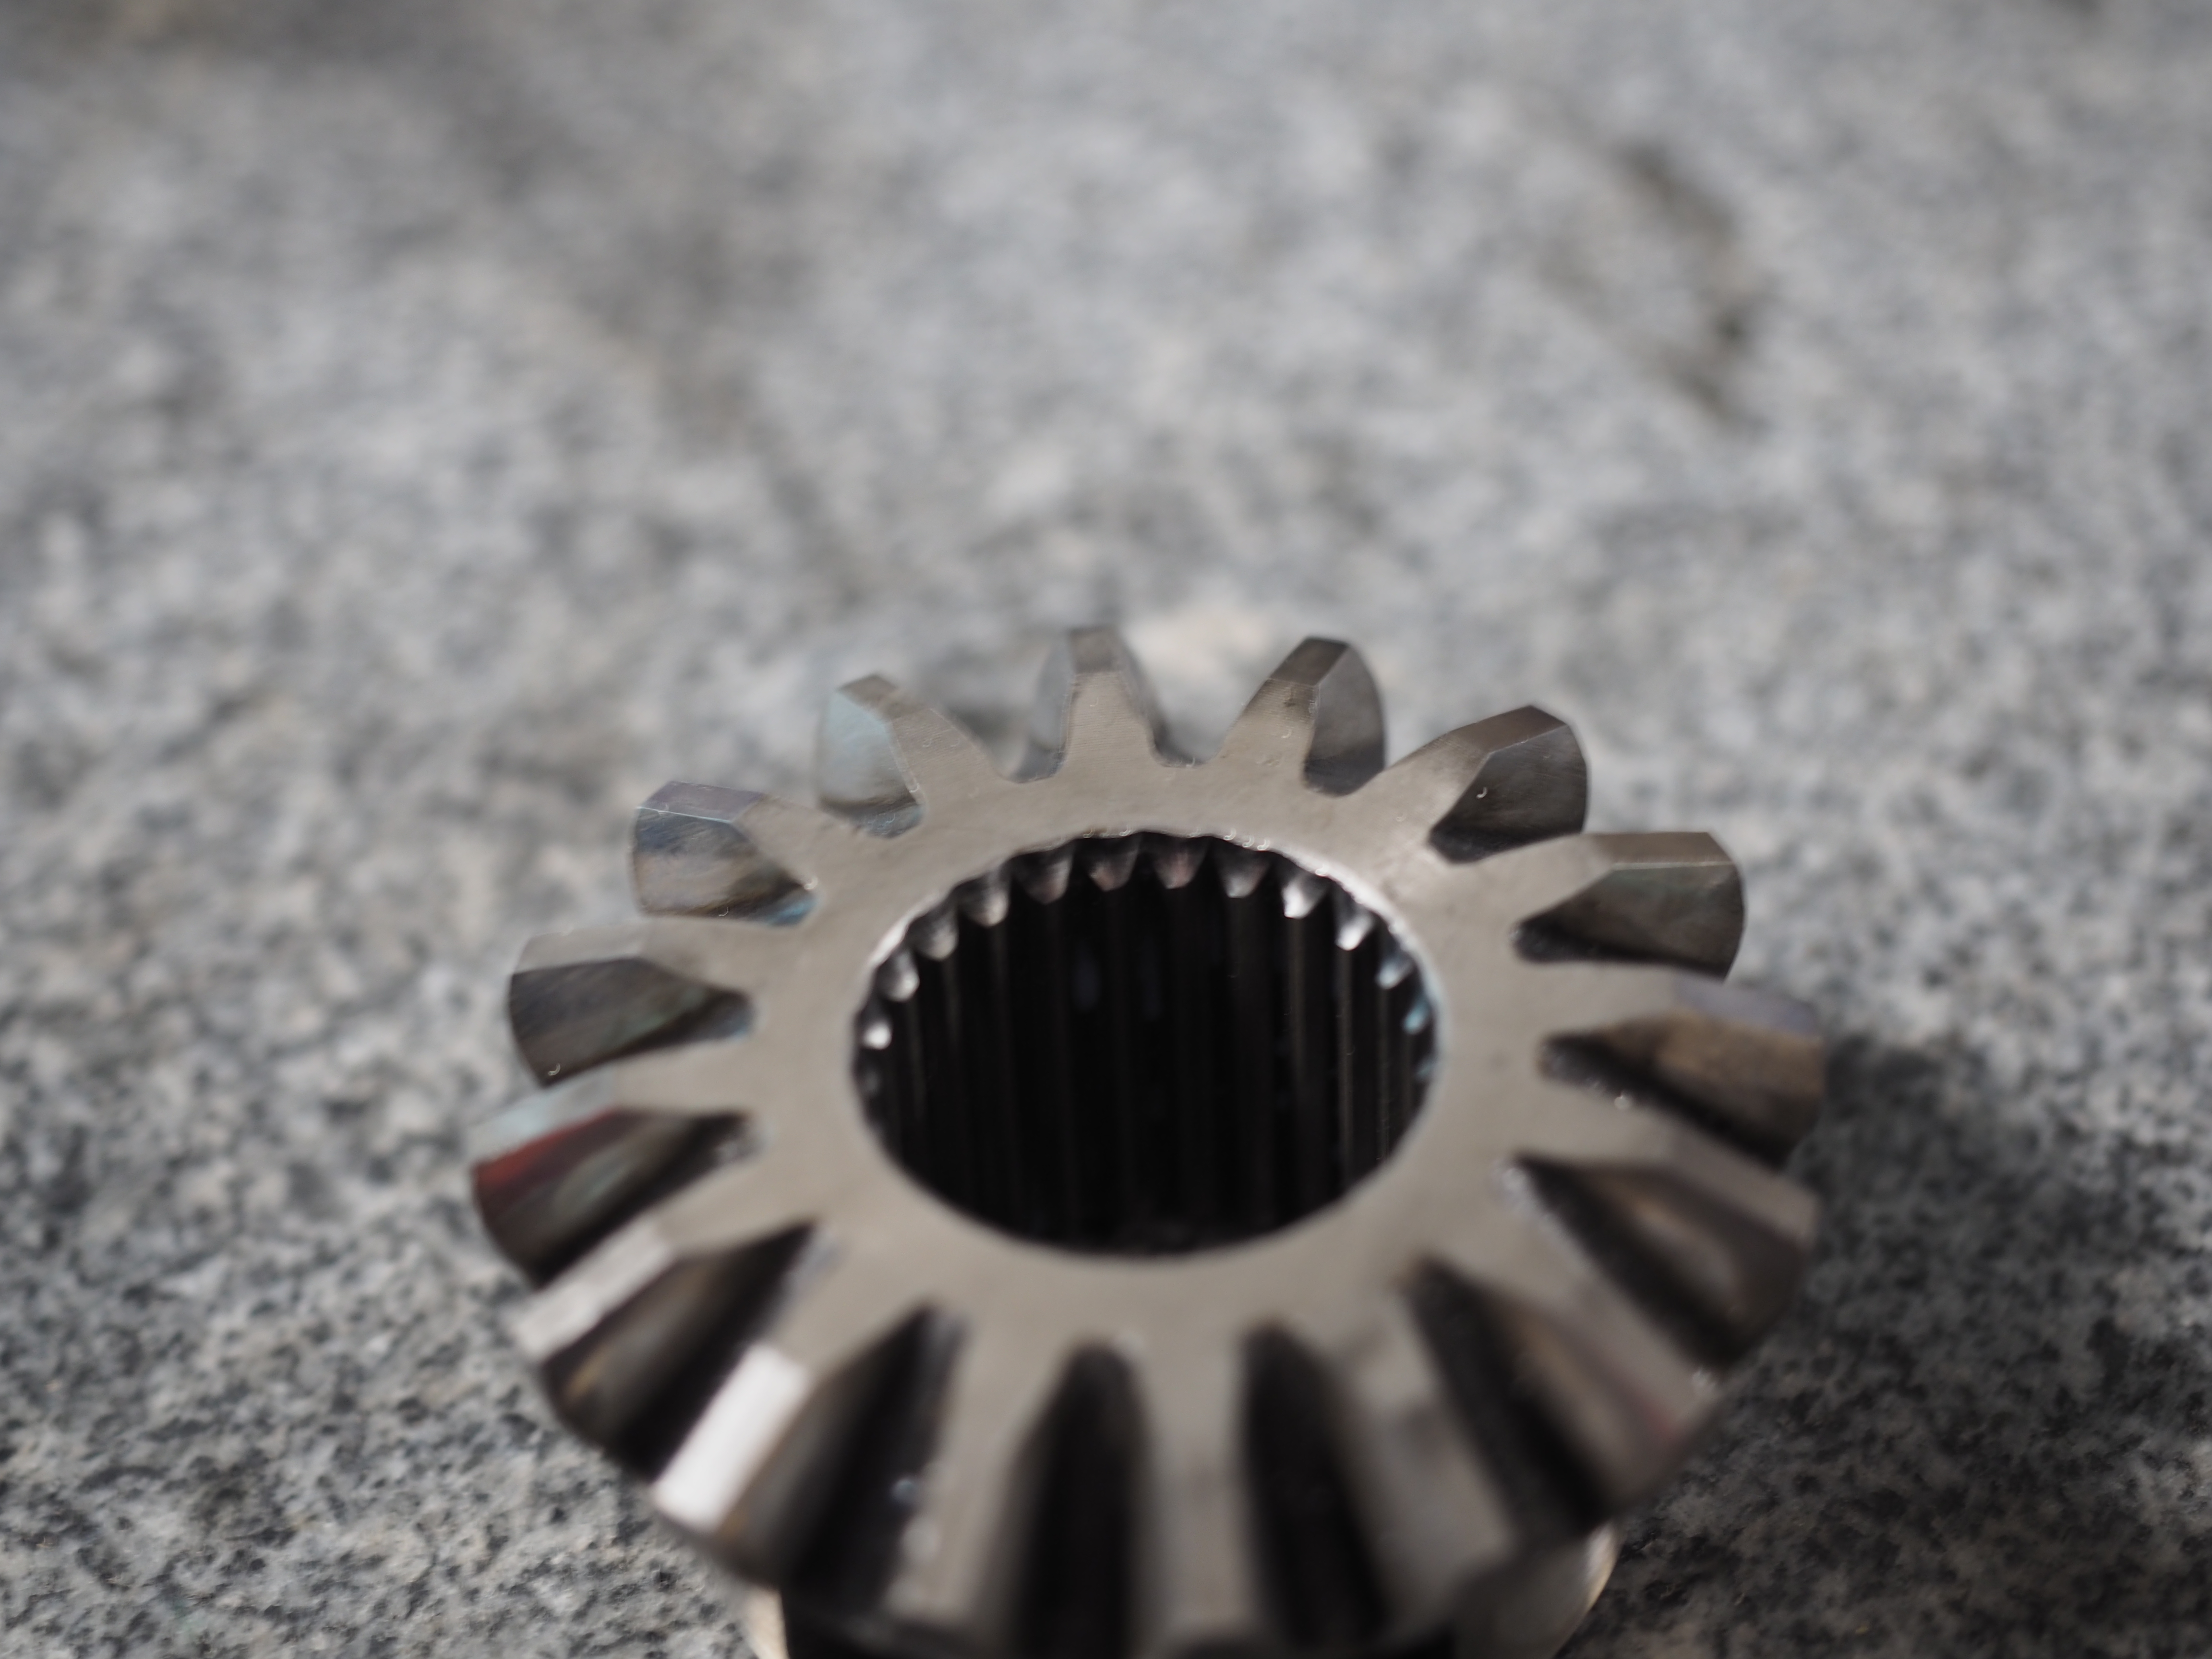
In this picture the side gears out of the Miata are on bottom and the side gears out of the FB LSD are on top. The miata gears appear to be a forging of some kind, as the surface finish of the gear teeth are not machined or ground.
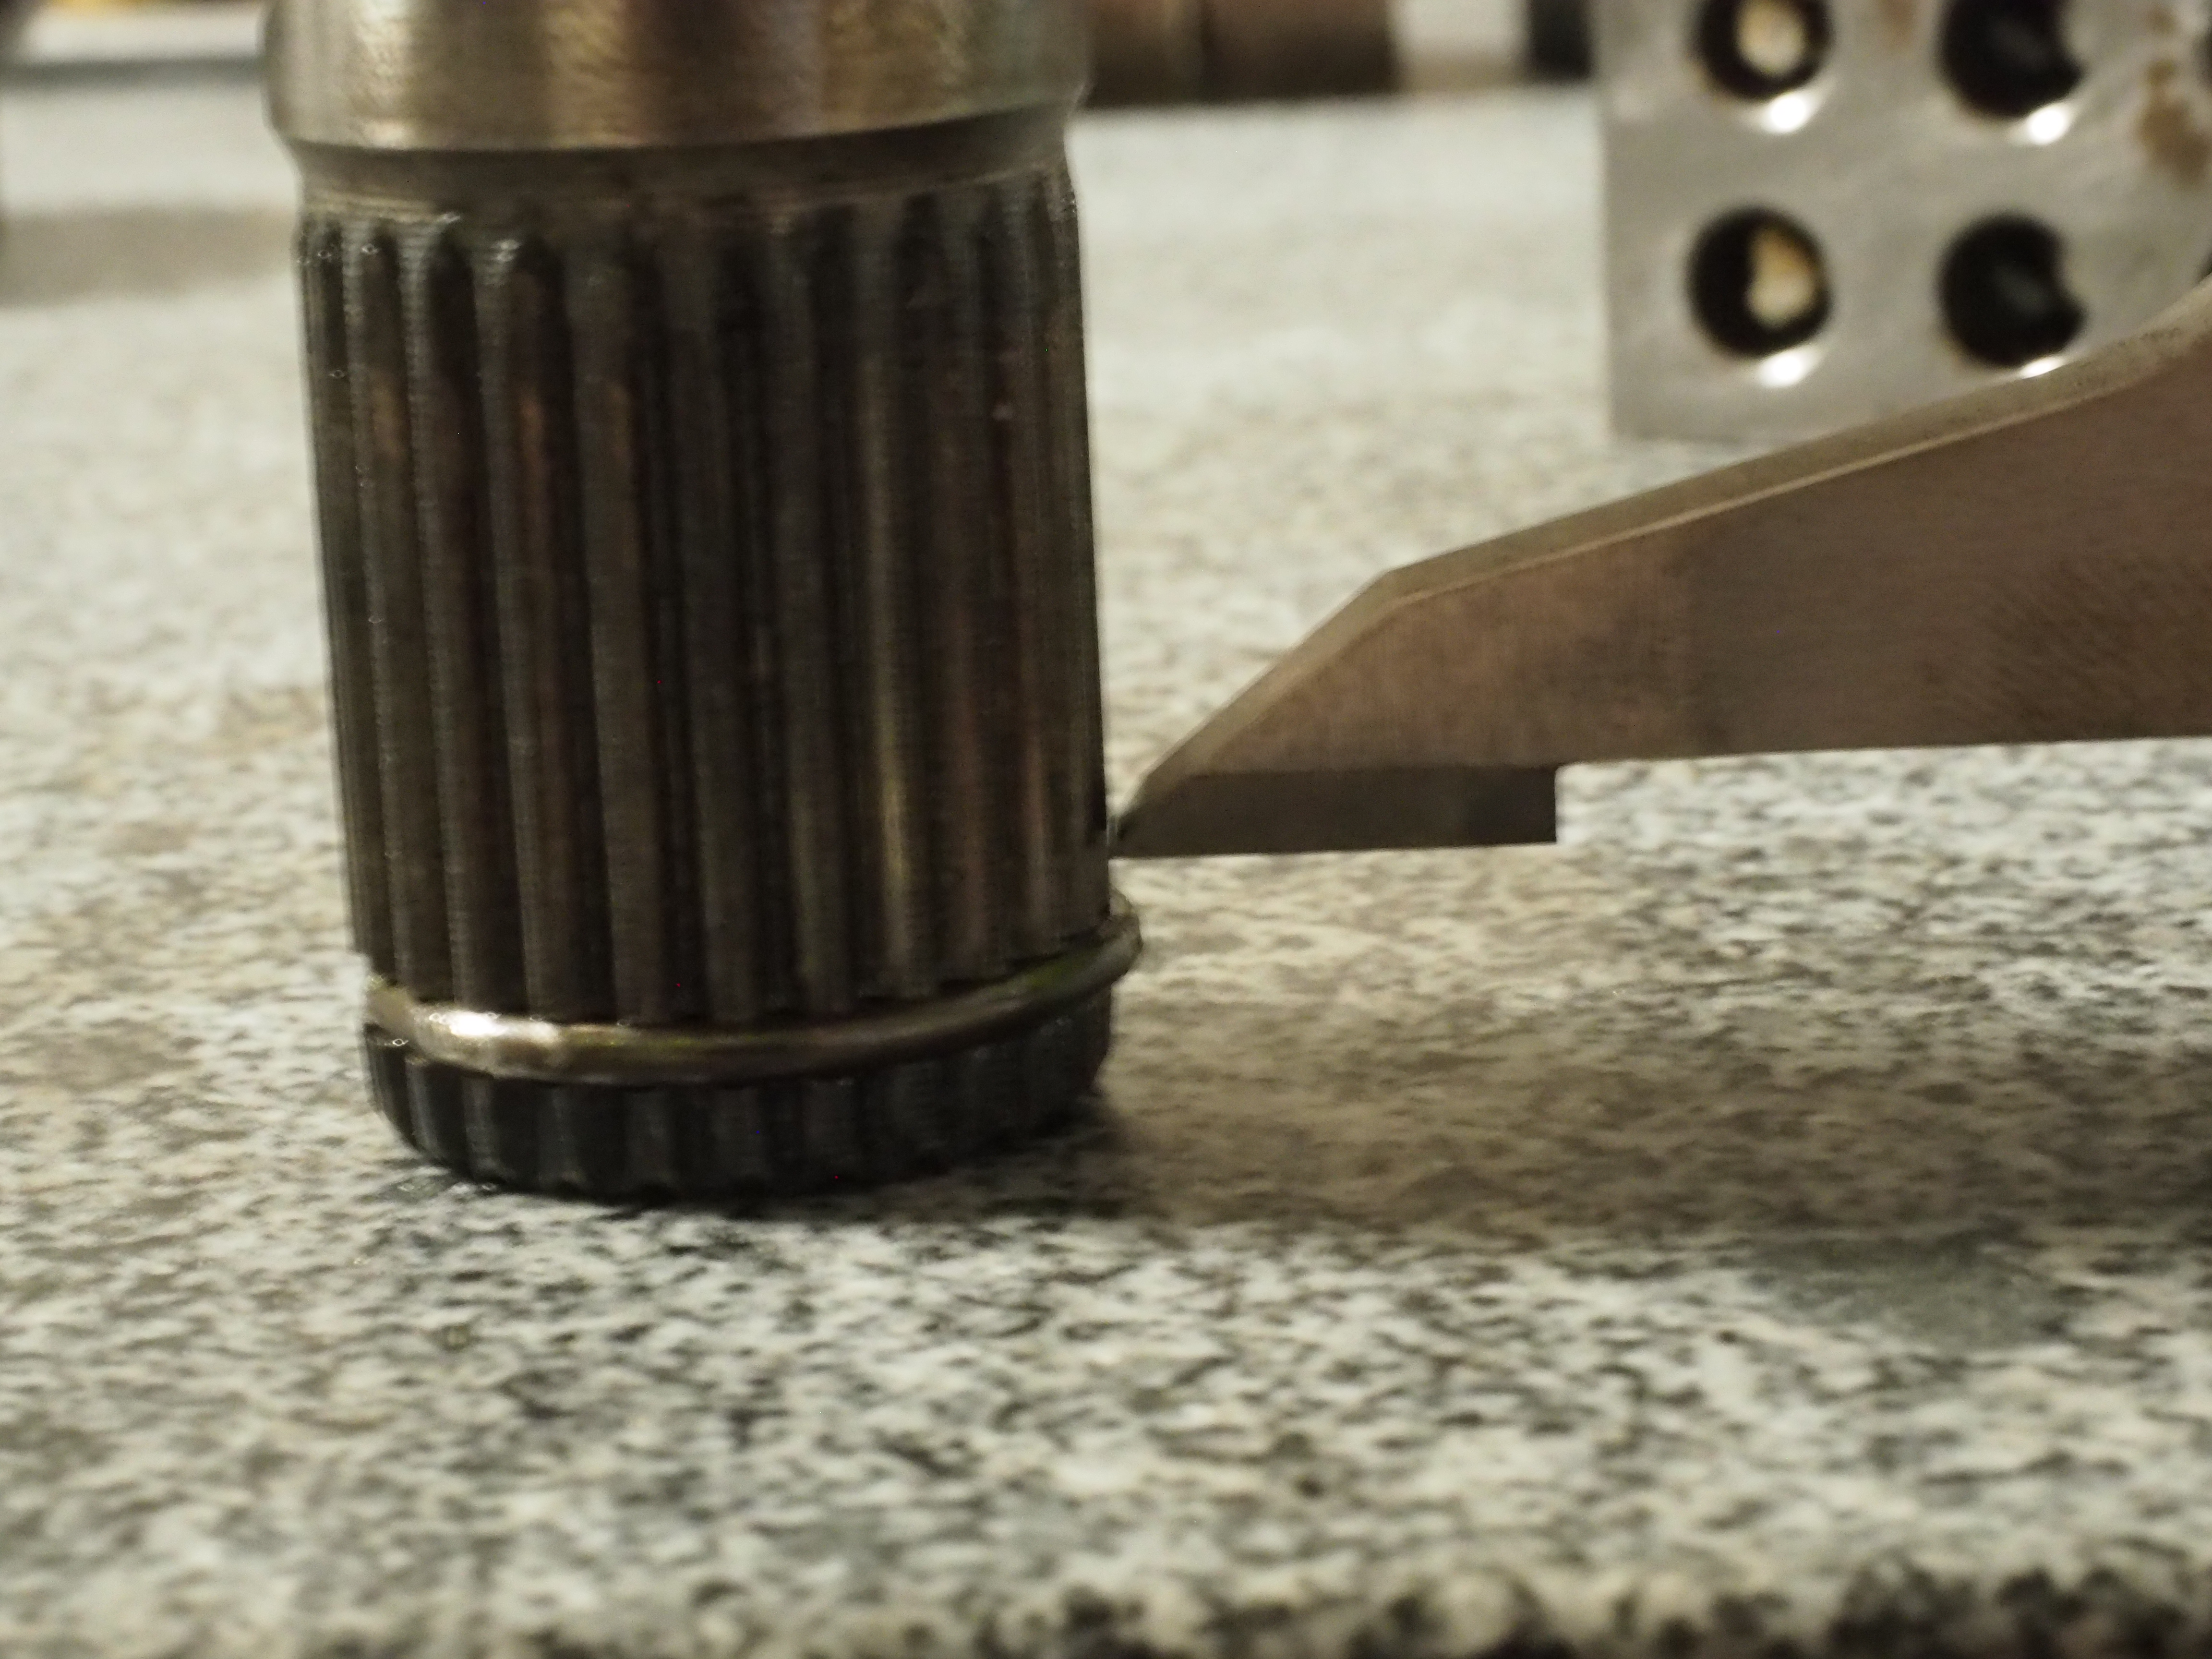
The serrations that mate to the axle stop a few millimeters from the inside face. When the axle shaft is all the way in the differential the c-clip expands into this opening. I measured the distance from the inside of the serrations to the spider gear pinion shaft, which the axle stops against when inserted. The height gage in the following picture shows the height of the serrations in the Miata differential. It can be seen that the c-clip would be well inside the serrations and fully expanded.
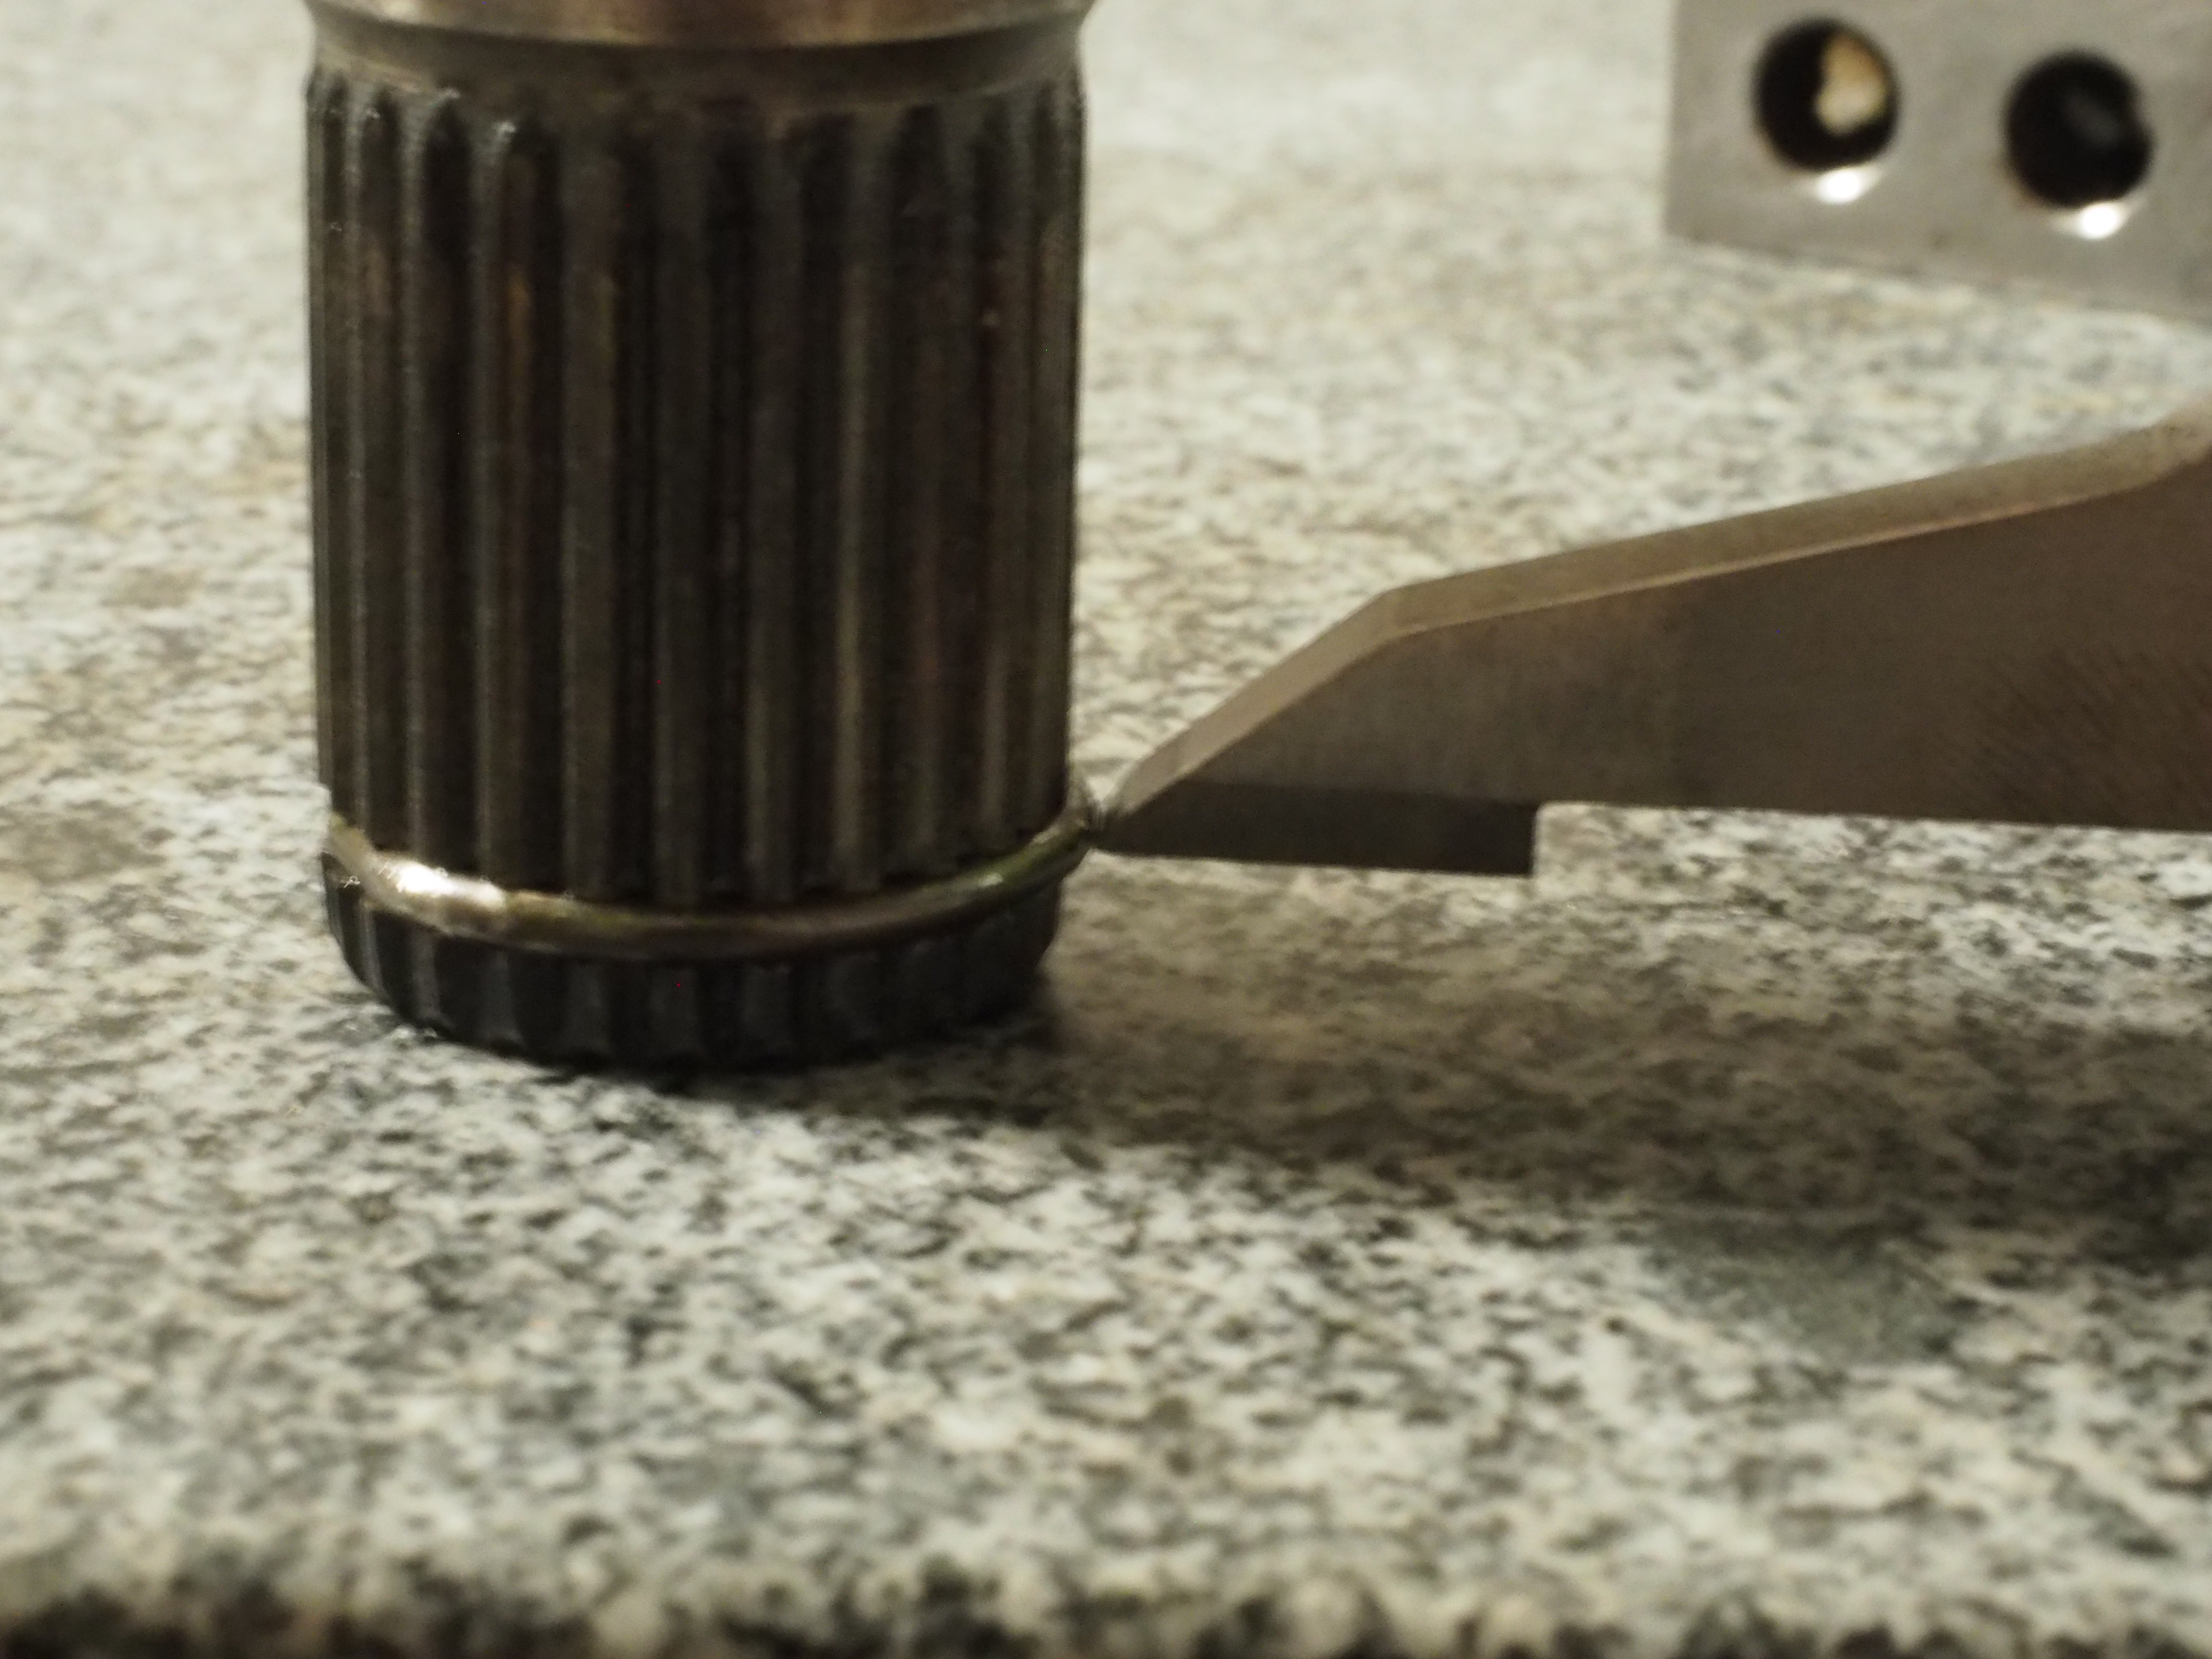
The serrations on the FB side gear come out almost all the way to the inside face. I similarly measured the distance from the serrations to the spider gear pinion on this differential. The height gage in the following picture shows that the c-clip would expand fully. This can be felt when testing an axle shaft in the differential. The axles are in rather snugly, but can be removed by hand.
Machining side gears
I considered using the side gears as they were, as the c-clips were still a tight fit in the serrations buying another RX-7 LSD which was listed as being from an FC and came with stub shafts. I decided I should try machining the side gears to clear the c-clips. With the measurements I had made I knew how much needed to be cut to get the same engagement as the Miata side gears.
My hardness testing files showed the side gears to be above 40 Rockwell C and below 45 Rockwell C in hardness. I looked up some machining parameters for this hardness in my Mechanical and Metal Trades Handbook and used the conversational programming on my Tormach 770M to generate toolpaths for pocketing. I wanted some kind of chamfer or radius from the wall of the pocket to the serrations to match the Miata side gears. I used a 6 mm ball end mill to give me a 3 mm radius. The 6 mm ball end mill I have has a rather long fluted section and gave me quite a lot of trouble. Since I didn’t want to clamp on the flutes it had enough stick out to cause deflection and chatter. I expected some, as hard milling with interrupted loading isn’t exactly ideal cutting conditions, but the surface the tool left was less than desireable. If I were doing this one again I’d order up a different tool with shorter flutes.
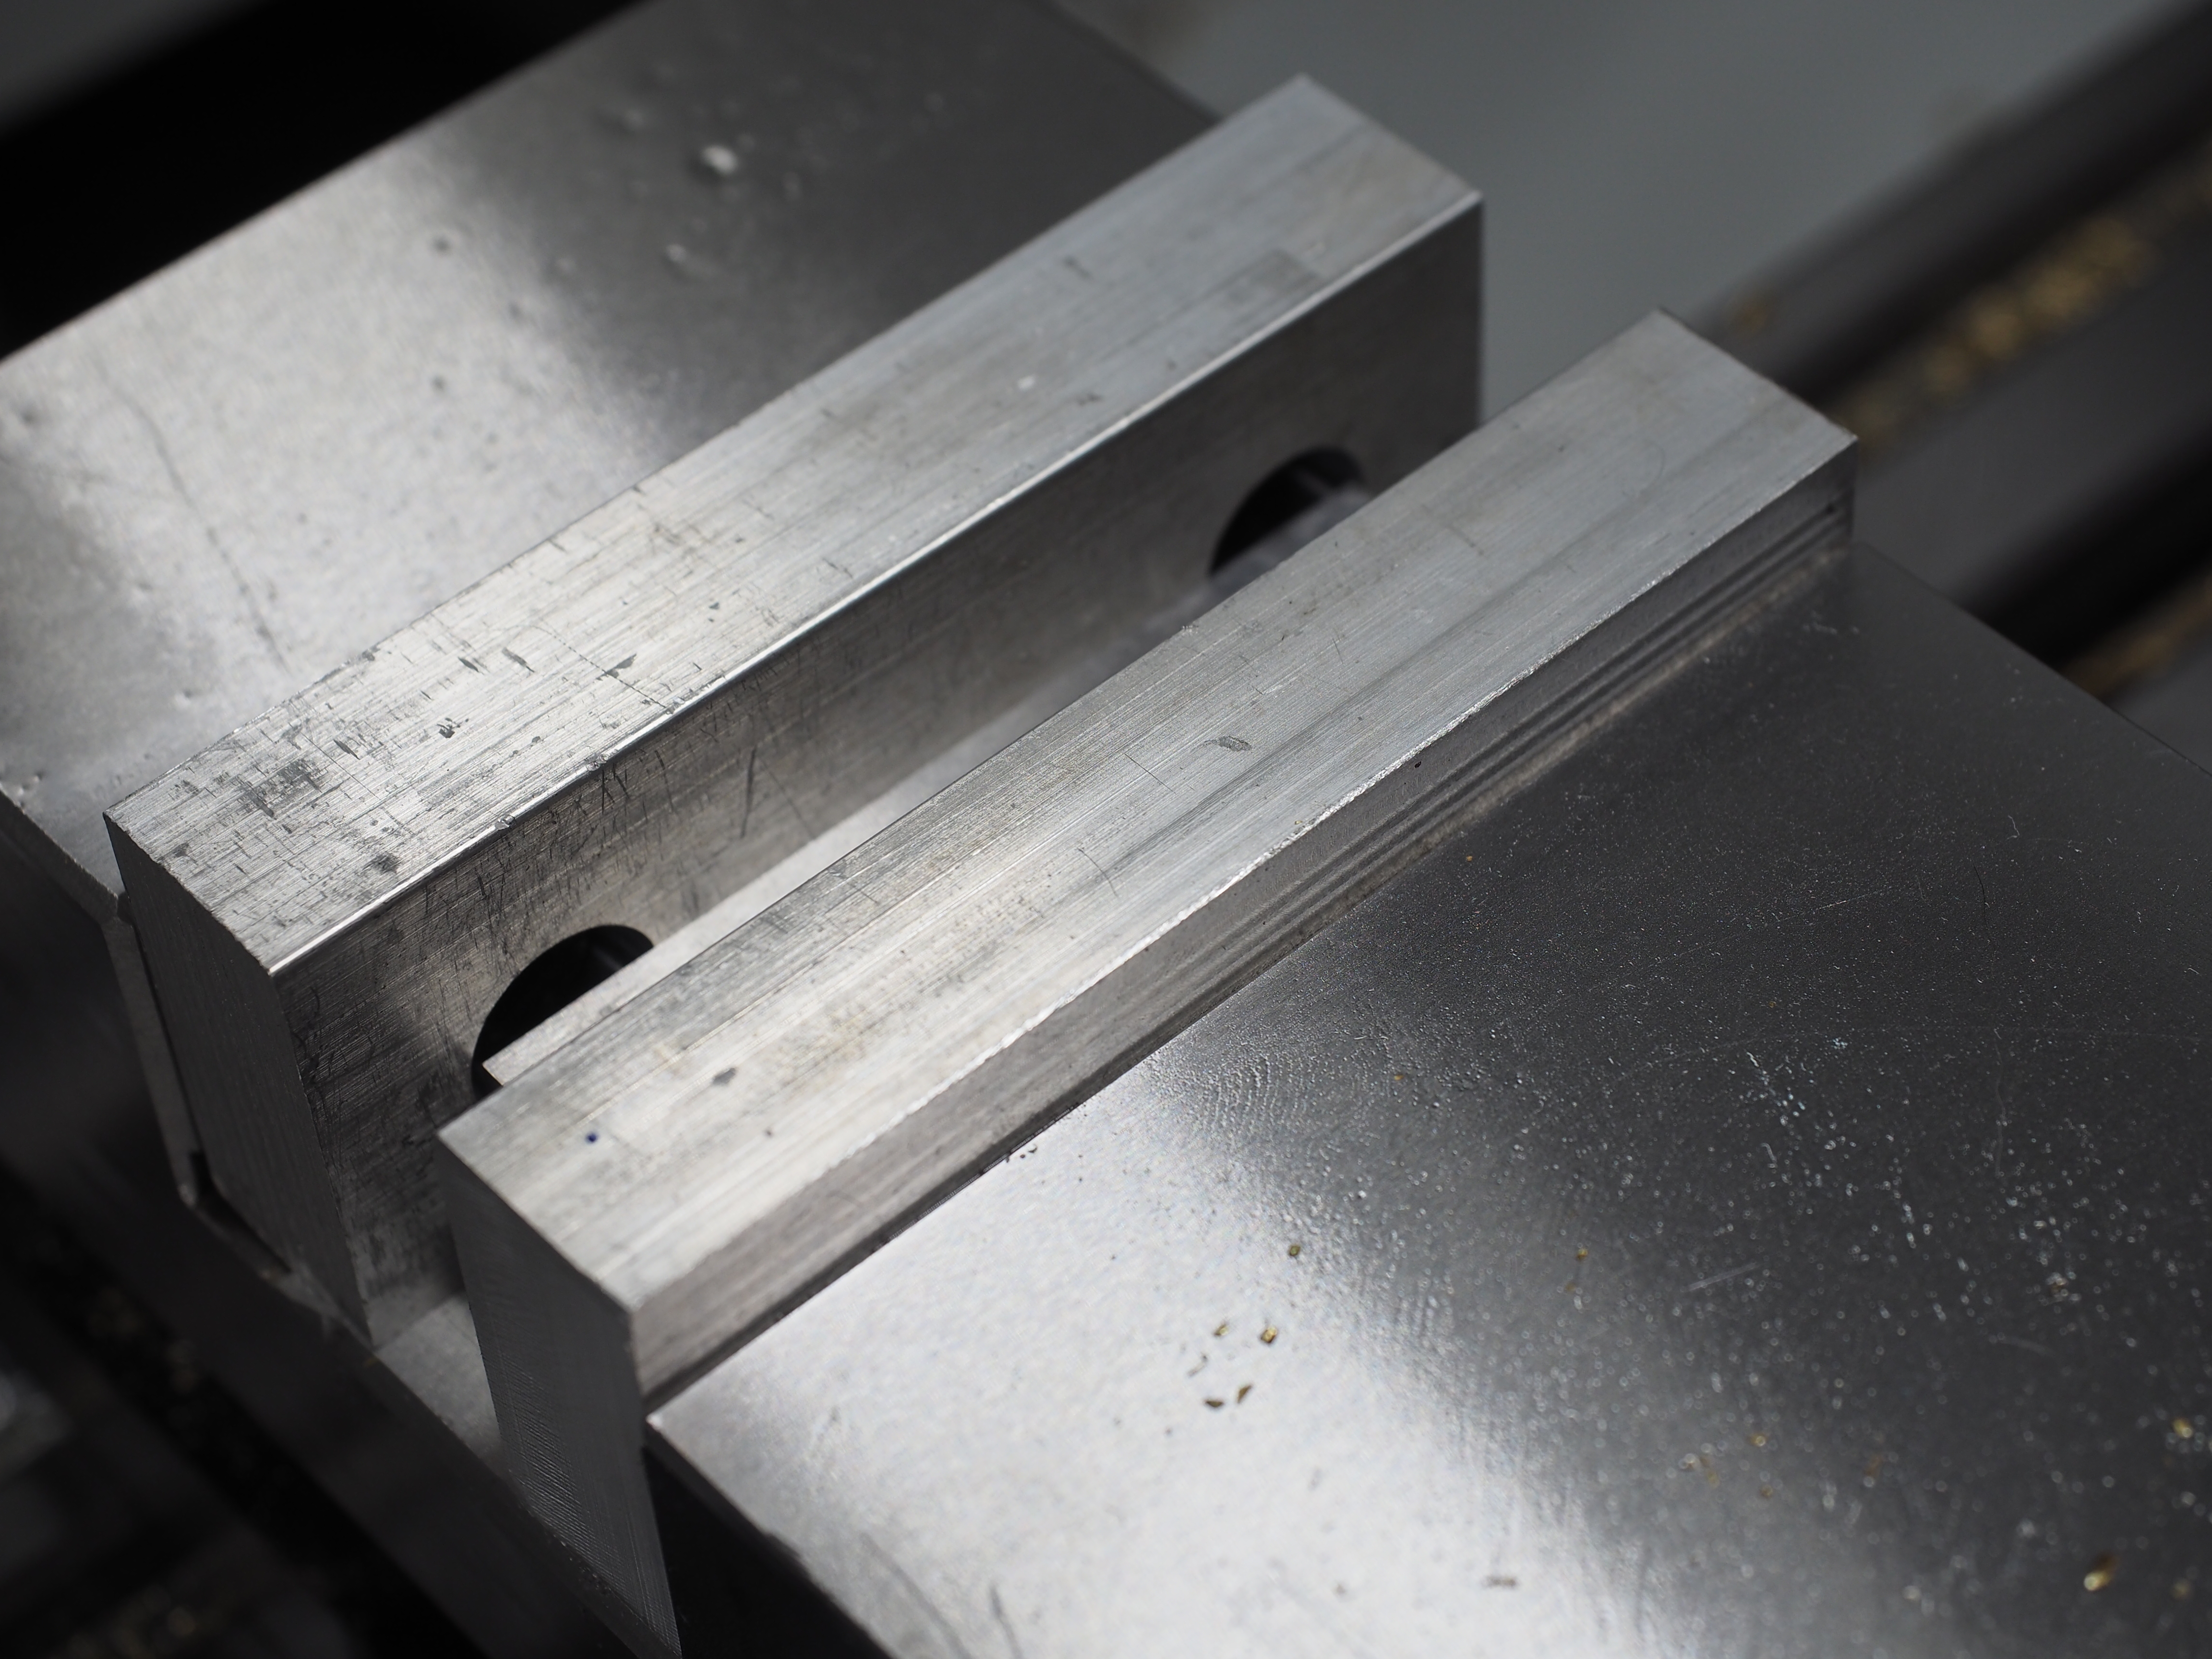
Rather than try to pick up the center of the side gear in the mill I decided to cut a set of soft jaws. In this way I could define my coordinate system and place my part in it rather than the other way around.
One of the first things I did when I got my Tormach was order up some 6061 Aluminum bar stock and make soft jaw blanks. It’s my intention to have a blog post about this eventually. This set of jaws is 0.75 x 1.5 inch stock. The faces against the vise are machined while the others are left unfinished.
I programmed a round pocket using Tormach’s conversational interface. I’m really enjoying this for quick operations like this.
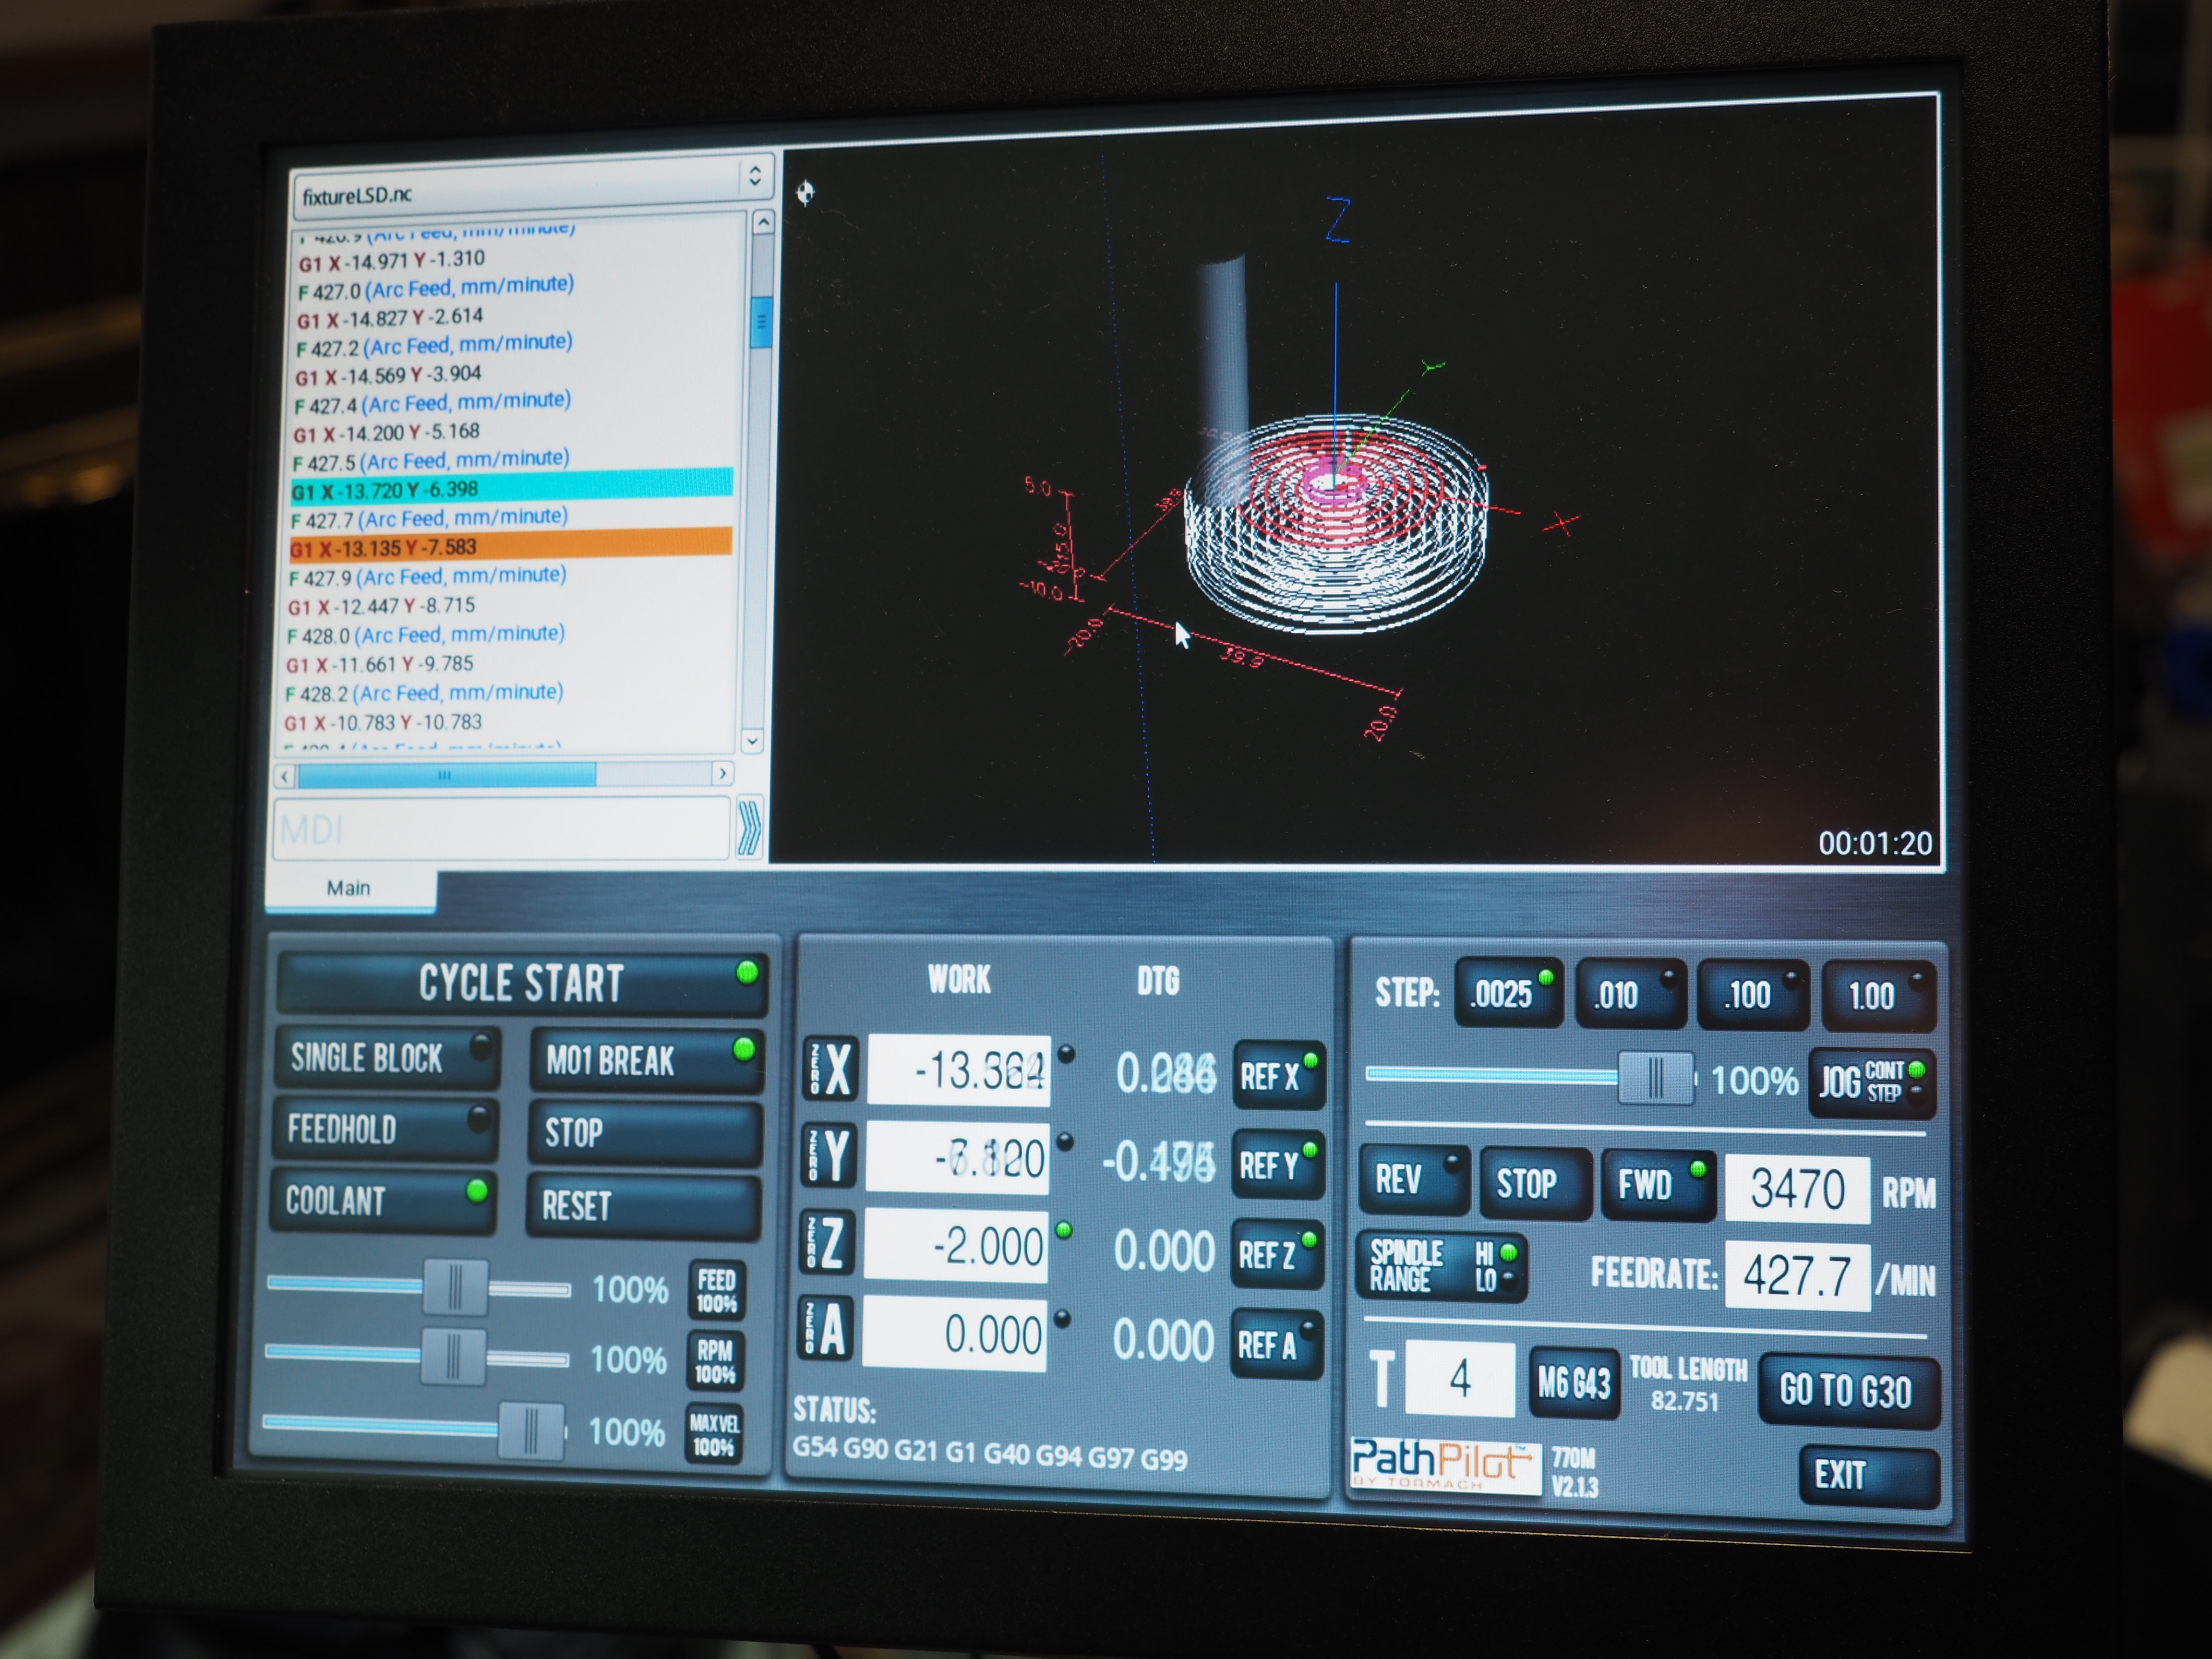
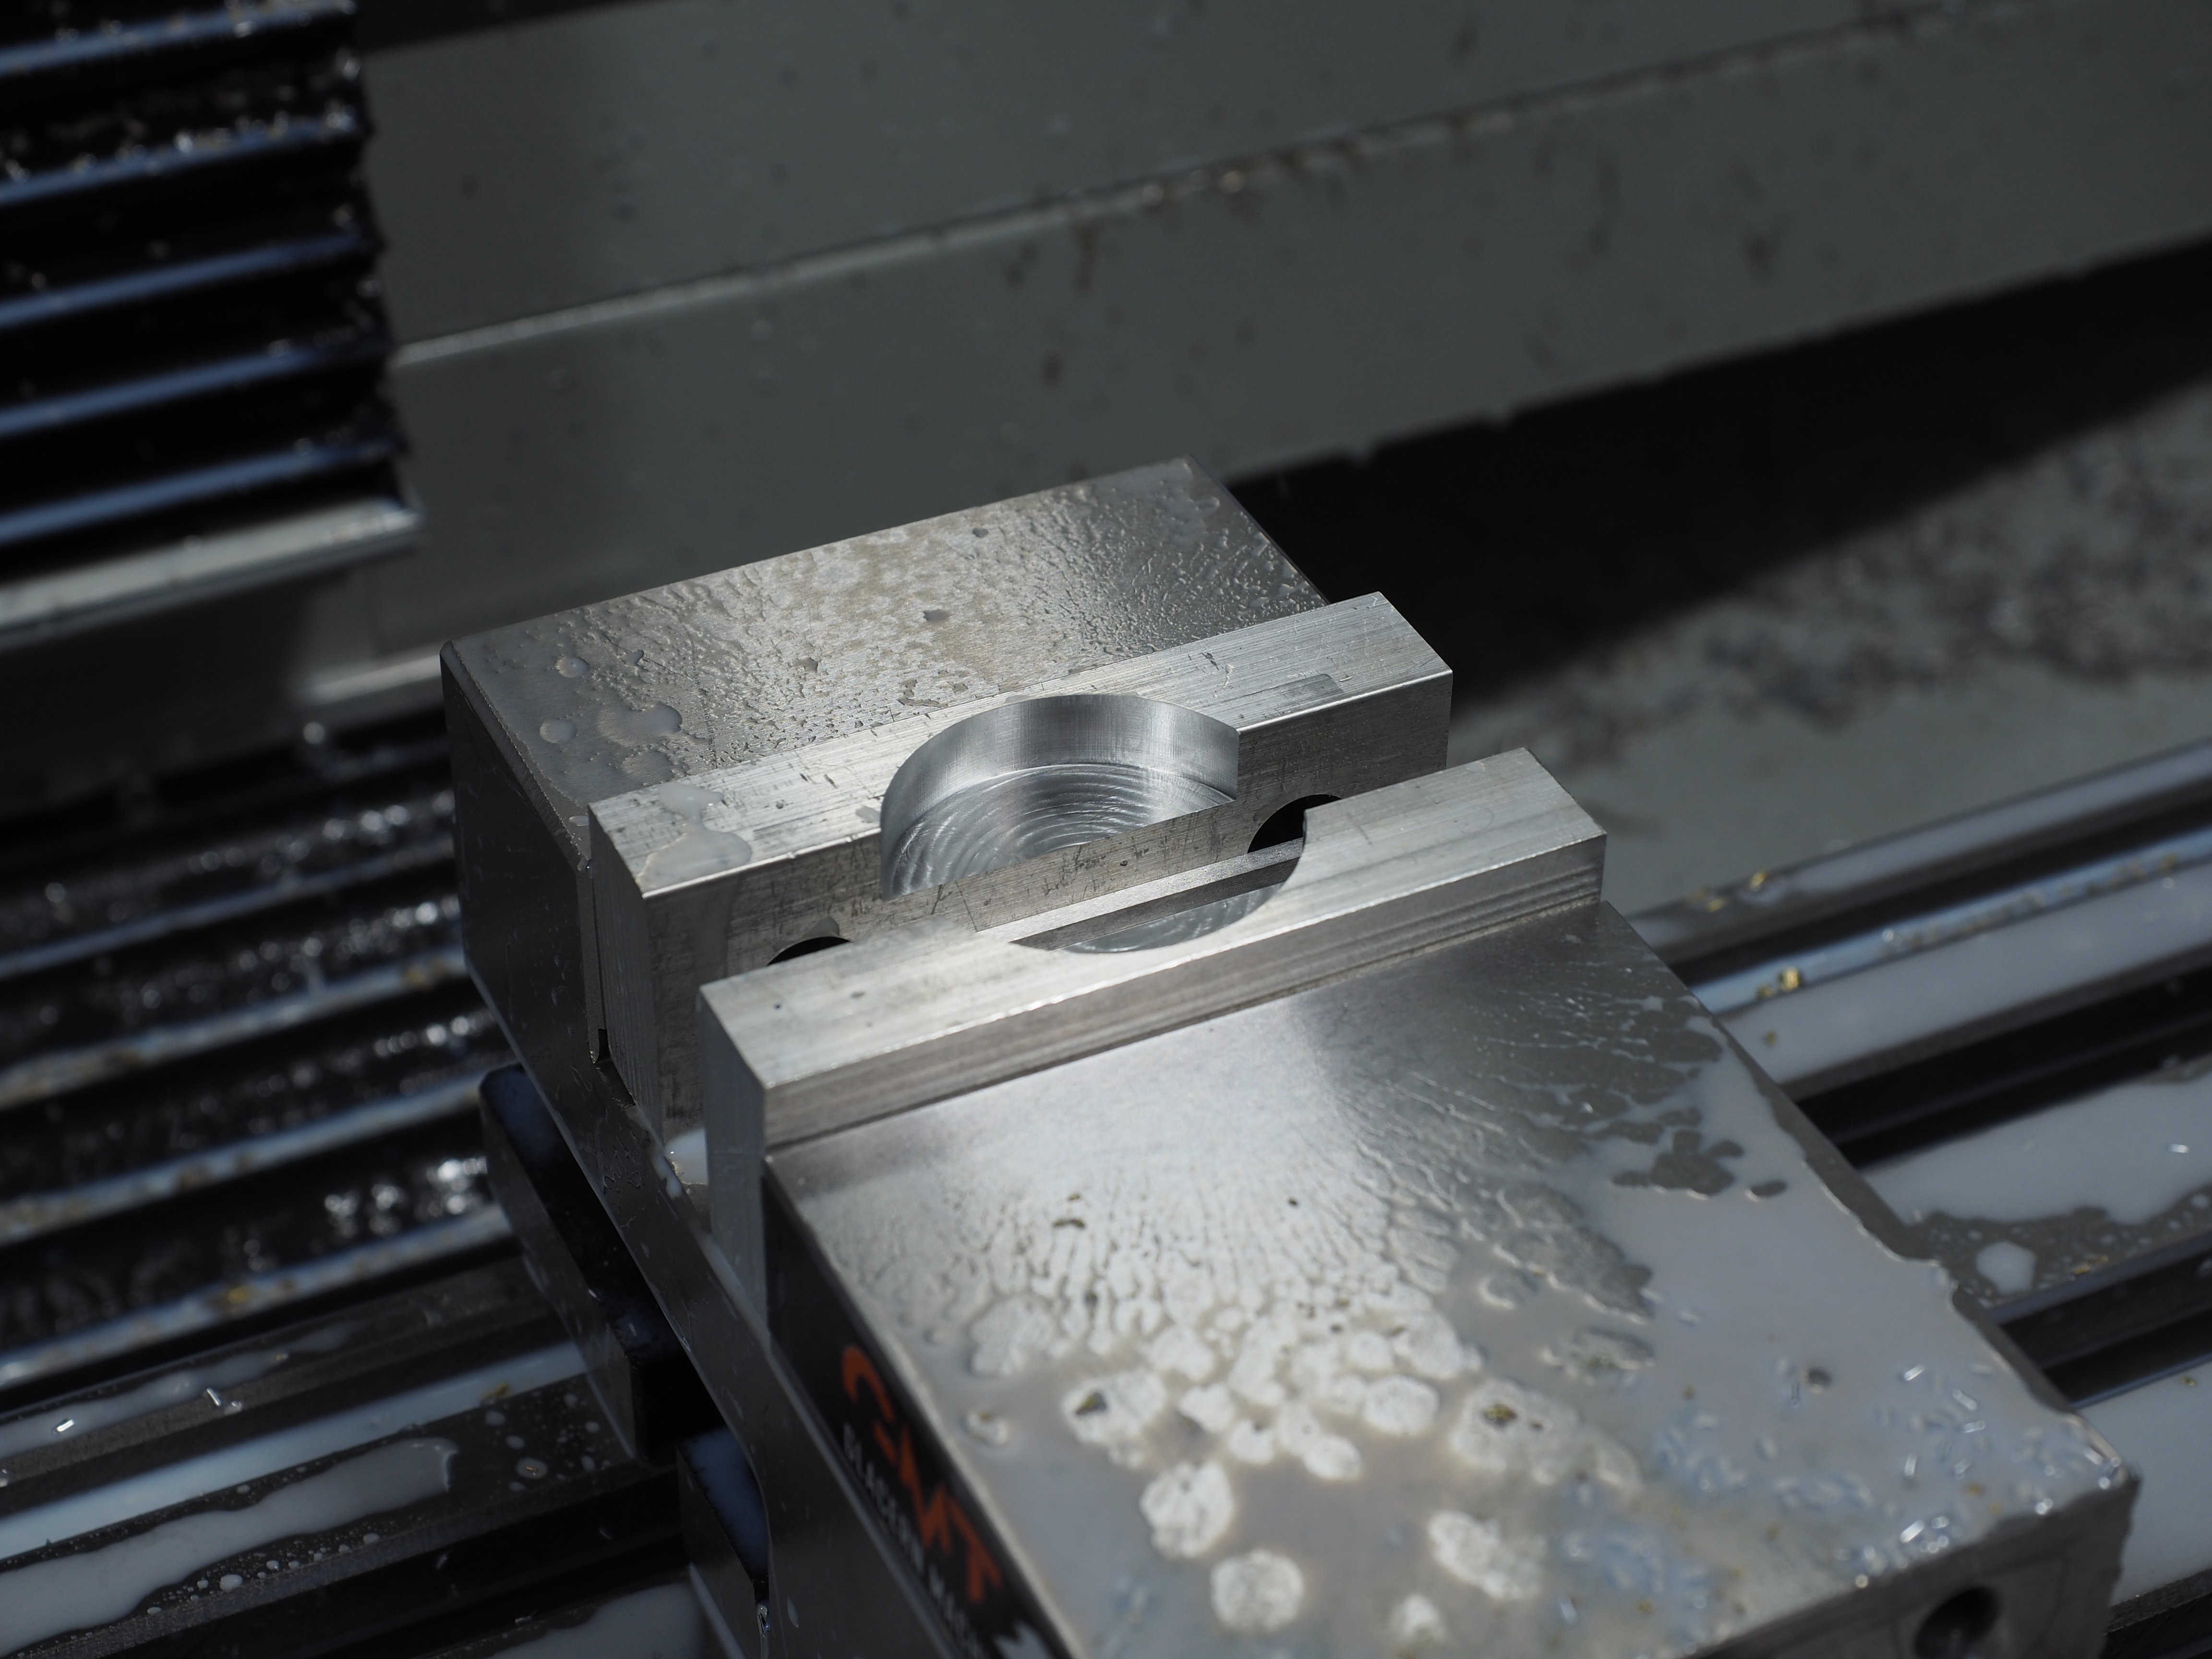
Here you can see the results of the deflection mentioned earlier:
Assembly
I remeasured everything as I was reassembling. We’re all within Mazda specification. The clutch stack is on the thick side of the specification, which should provide more grippy behavior.
Conclusion
Next time I need to do something like this I’m going to pick up tooling specific to hard milling.