making holes, AKA Quorn part 3
Introduction
having previously faced the feet of my base castings, the next operation in Hemingway Kits’ list was to bore the base castings for the horizontal bars. There are quite a few ways to do this and we are, unfortunately, going to talk about nearly all of them.
What we’re starting with.
The raw castings have 19 mm holes roughly centered where the final bores need to be. This is good because it means I don’t need to predrill for any further operations. Those bores are meant to be a close clearance fit on the horizontal shafts. So this operation involves removing about 3 mm of material radially.
Setup
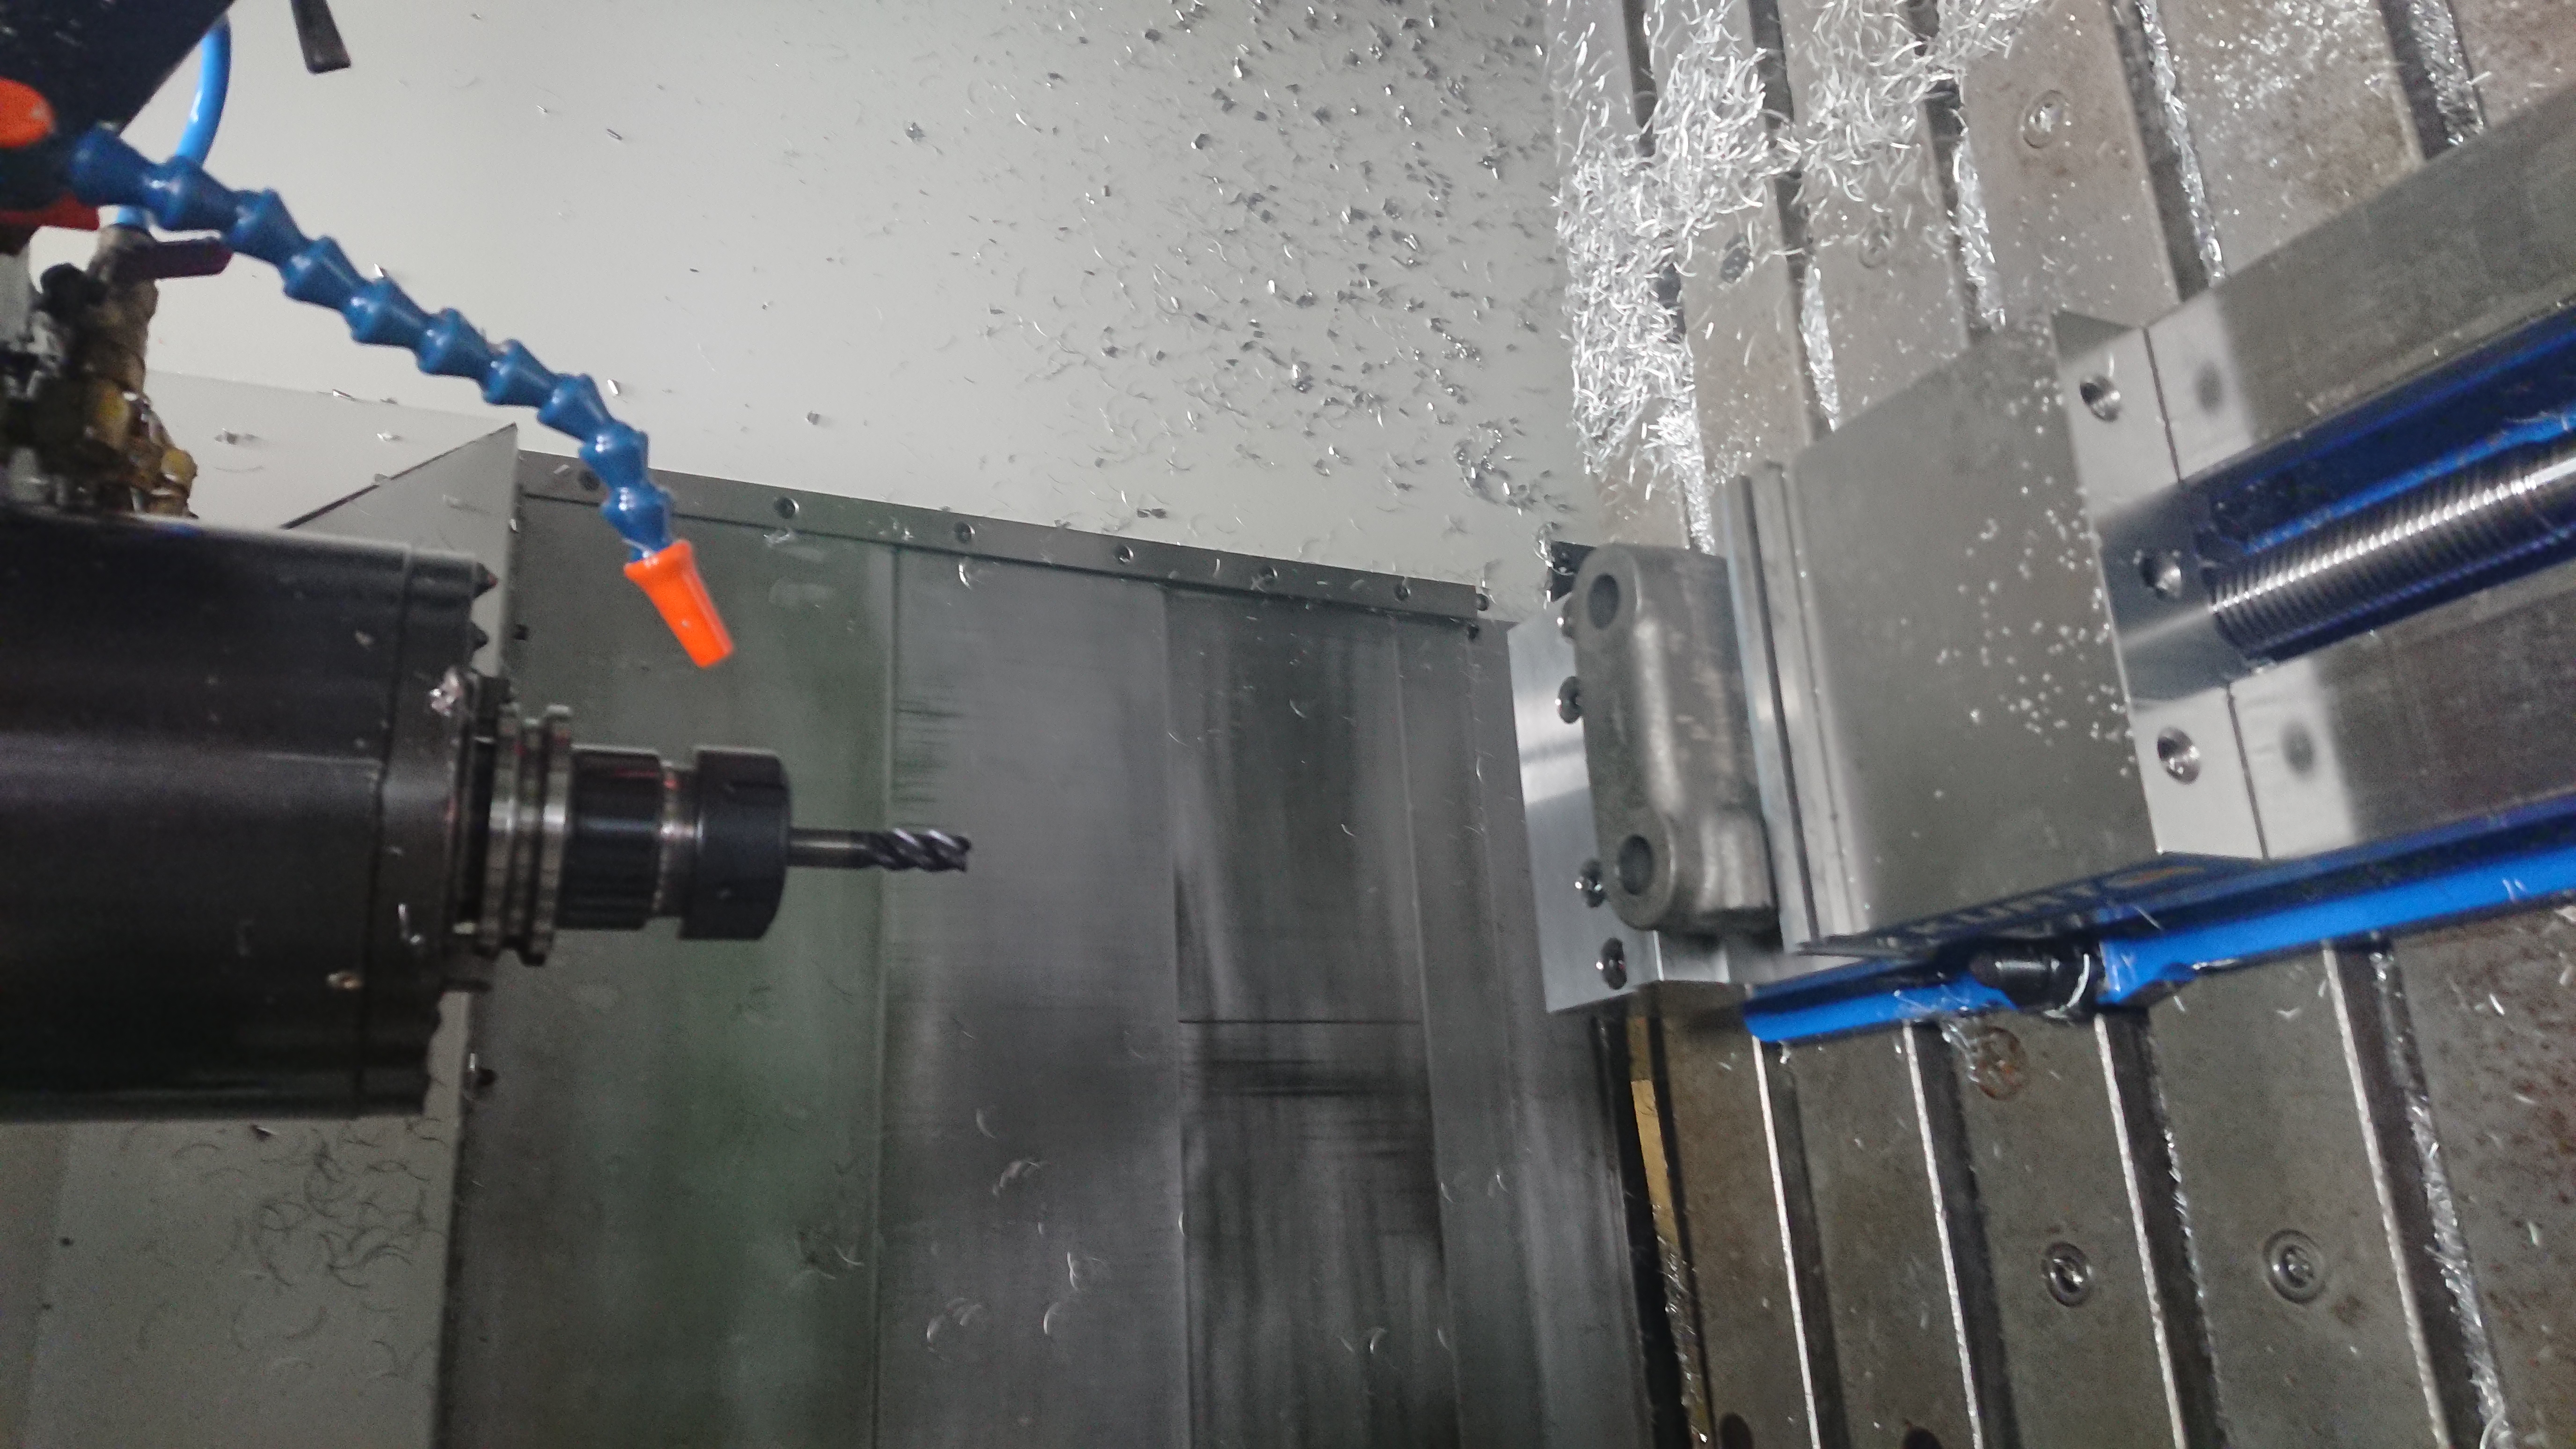
Now that the feet are faced I placed them against the fixed face of my milling vise. I used a single parallel to raise the castings up so that it didn’t shift as the vise closed. A piece of PVC between the movable jaw and the casting seemed to help as well. After leveling the casting across the vise I had a decision to make. Where do I put the holes?
I measured the location of the rough holes and found them to be well centered to the overall body of the castings. I also found them to be well located on the Y axis in my setup. I wanted the holes to be centered on the body of the casting so I decided to base my coordinate system off the center of the left casting hole. I then checked the distance between the two casting holes and found that offsetting the coordinate system by 88.9 mm to the right was sufficiently centered over the right casting hole. This meant that I could write a single toolpath and repeat it by offsetting the coordinate system.
Roughing
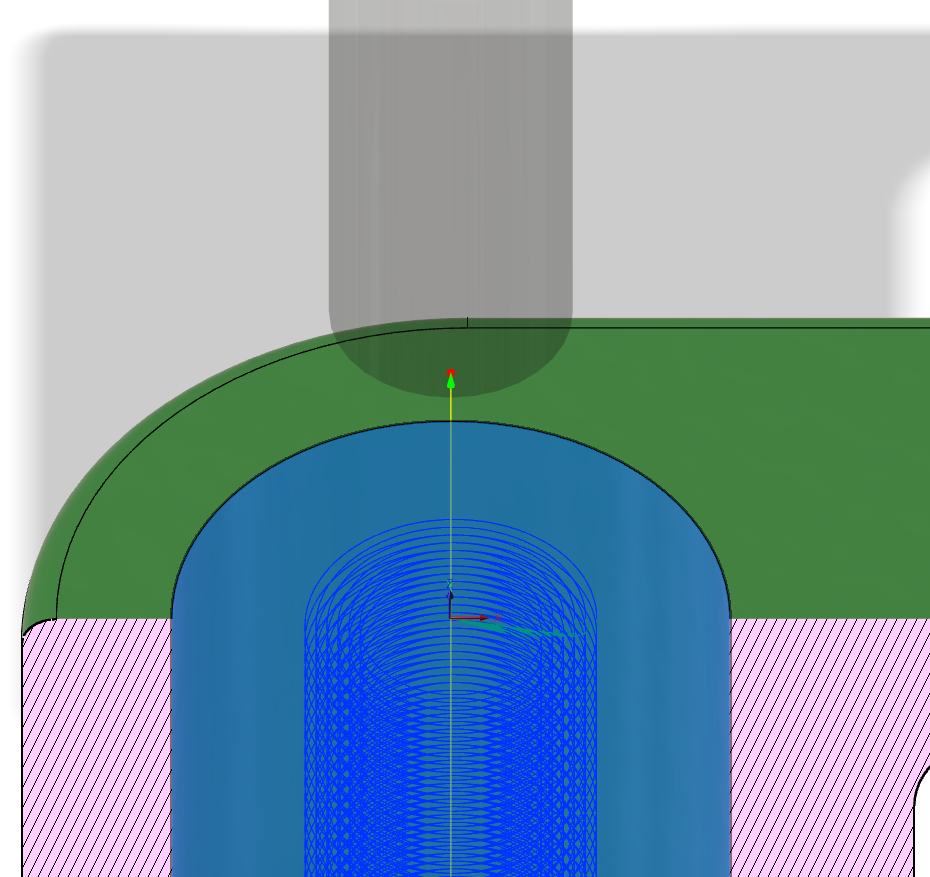
In this case it makes sense to do roughing opperations up to about 1 mm undersized and then decide how I would do finishing operations. I dug around in my toolbox and came up with a Maritool 4 flute AlTiN-coated 11.1125 mm (0.4375 inch) reduced-shank end mill. I’m a big fan of reduced shank end mills, as they are stiff and can be adjusted to minimize stick-out.
I used a spiraling toolpath starting at 19 mm and finishing with 0.5 mm radial stock to leave. As usual, I have more patience than sense here and opted for a 1 mm step down, 1 m/min feedrate, and 5000 RPM spindle speed. I’m not sure what this old Haas VF4 spindle maxes out at, but it didn’t sound terribly happy. I miss my Tormach.
After roughing both bores I got out my snap gages and micrometers and started thinking about finishing operations.
Finishing
I had a dream for finishing operations. None of which happened, but stay with me for a minute. My original intention was to do the finishing operations with a quality boring head and a nice solid carbide boring bar. Unfortunately, while trying to measure tool length I chipped the cutter. Lesson learned: spindles have momentum and carbide boring bars are fragile. Sixty dollars in the trash before it even got to spin.
Backup plan: interpolate with the reduced-shank cutter. I made sure Autodesk Fusion 360 was posting toolpaths with arcs and hoped this old VF4 had some life left in it. I’d seen some backlash in travel when touching off work with my Haimer so I wasn’t very hopeful. After more finangling with easing up on size I arrived at a very tight fit. It was easy enough to pull one casting out drop in another, establish the coordinate system, and then repeat the programs.
After action review
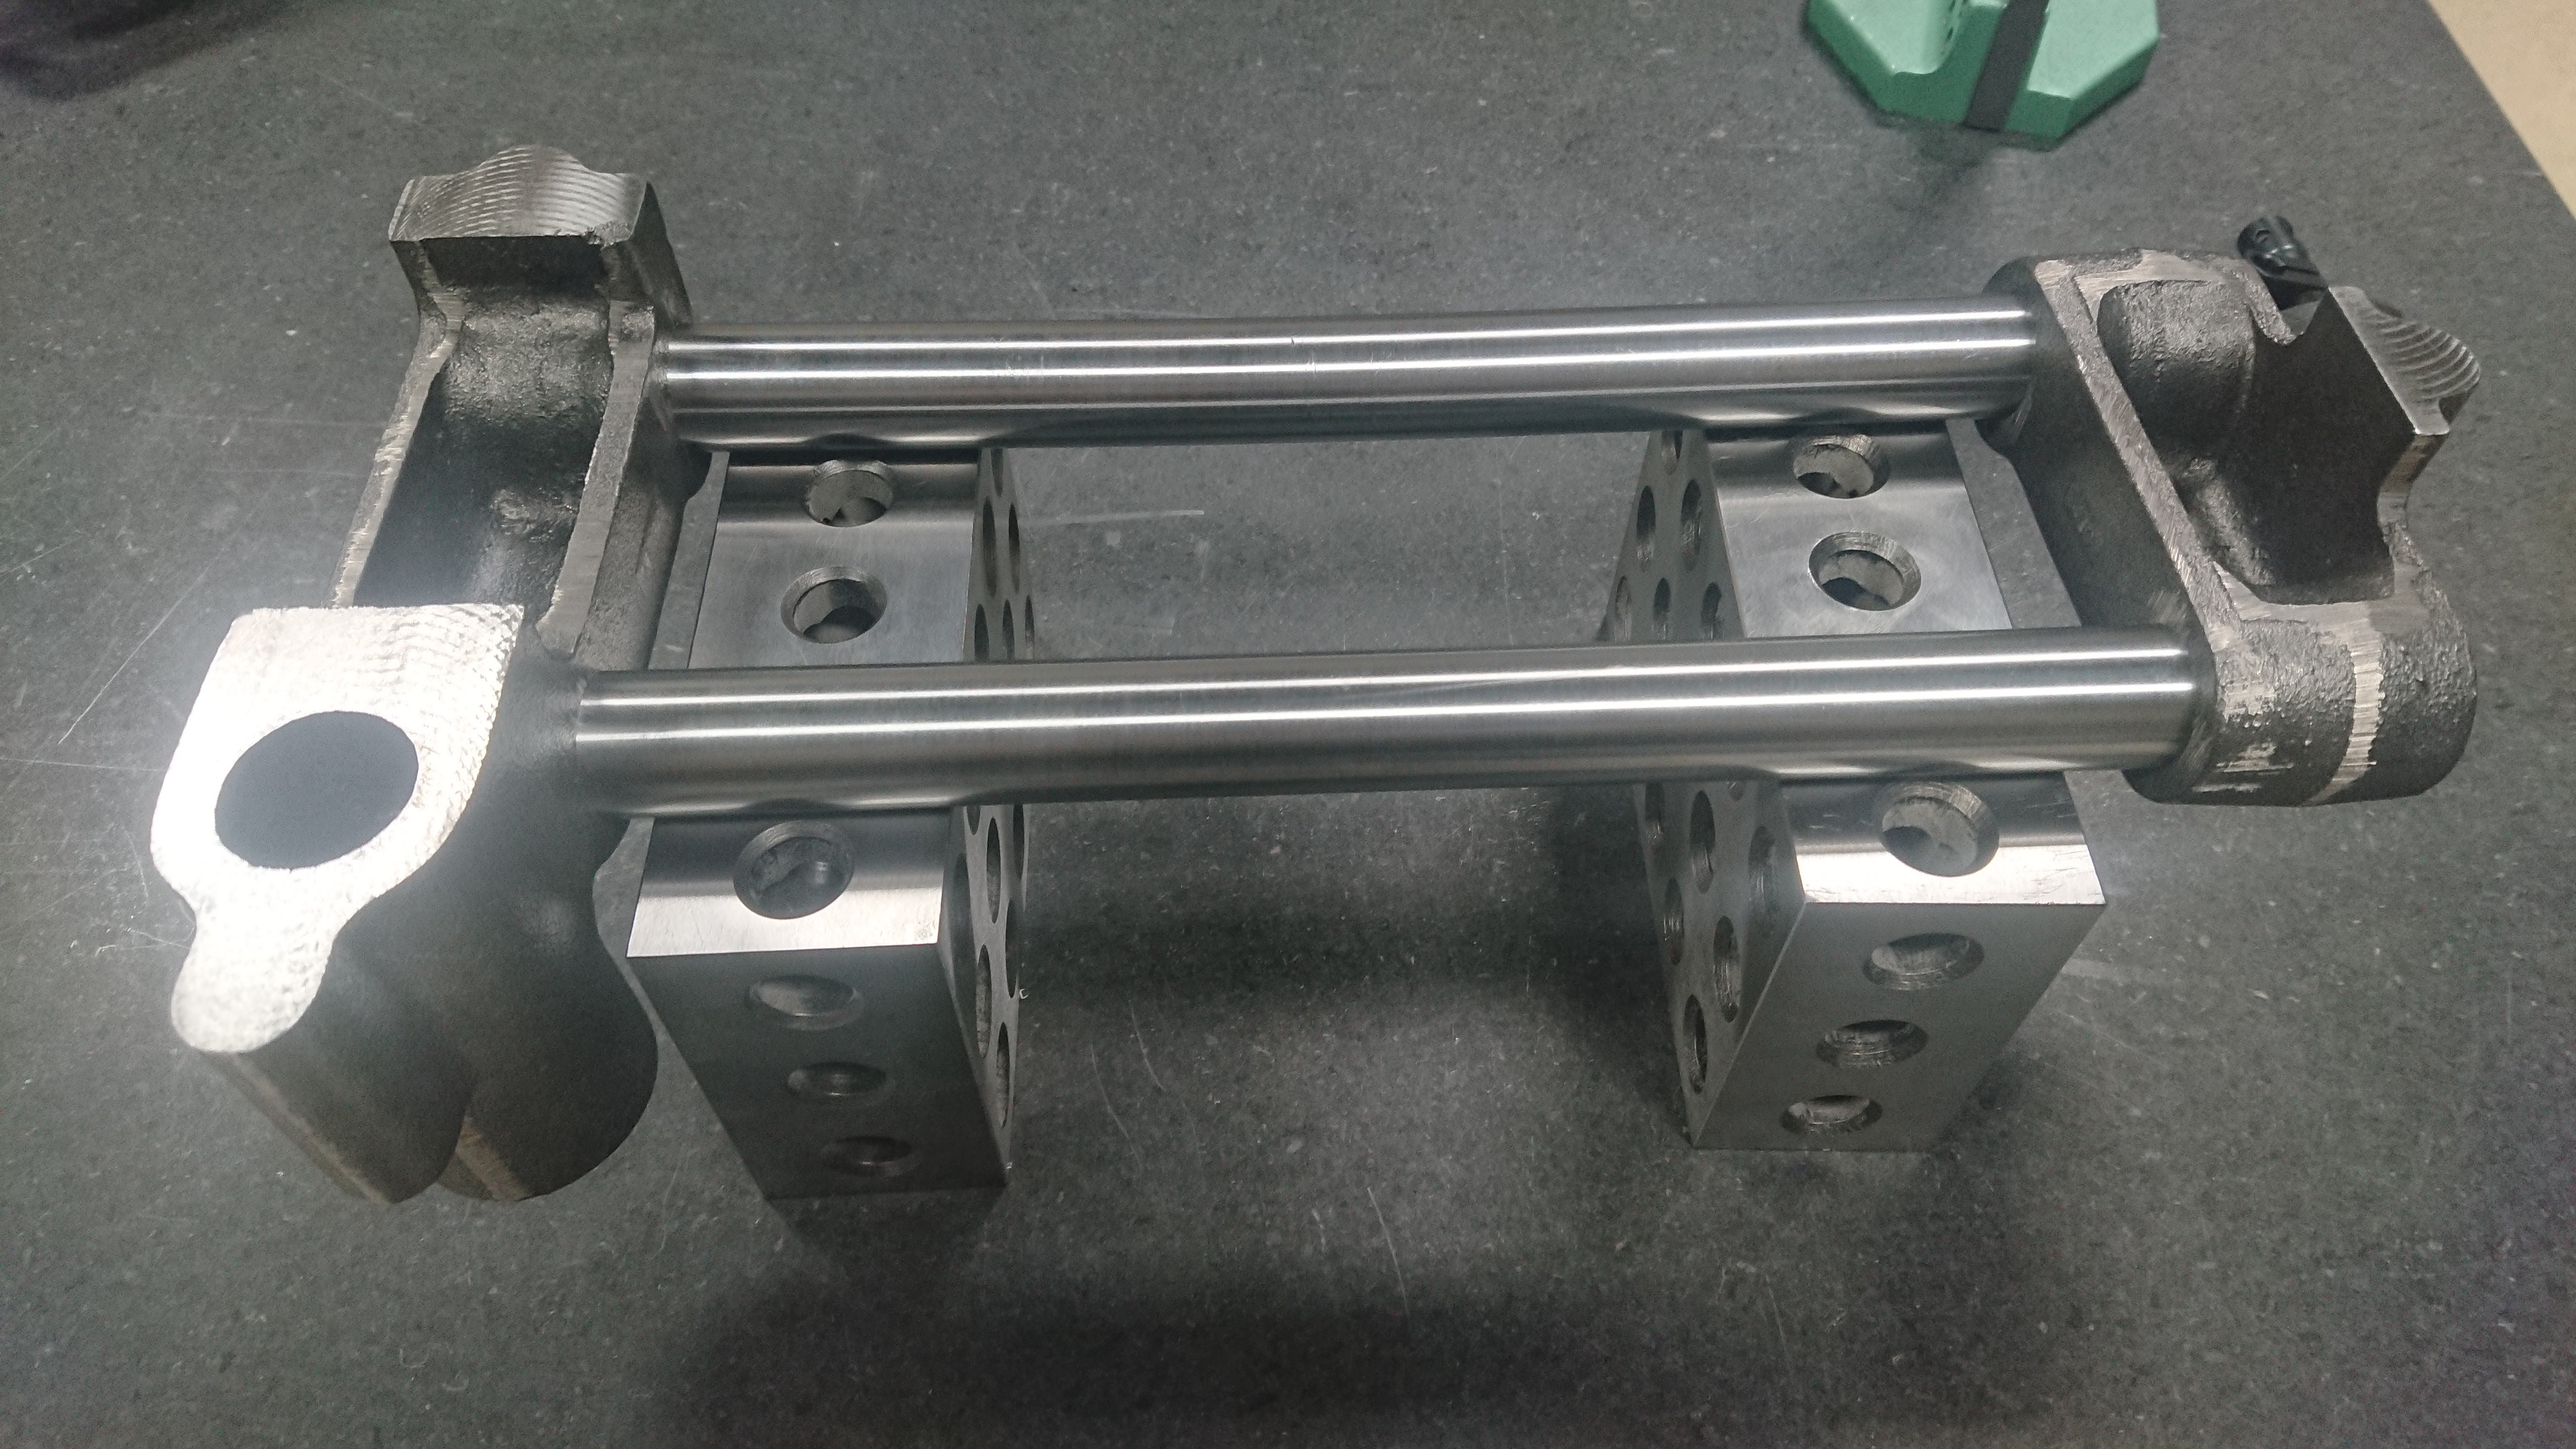
The two bars lined up very well in the two castings. The front bar is tight, but I’m excited about the idea of lapping it to size. Now that I had those features finished I could drop the mocked-up assembly over some gage blocks and see what kind of finishing operations will be necessary on the feet.
I think my next operation will be milling, drilling, and tapping for the wipers.